


If you've been working with Angular for a while, and delved a little bit into Angular Material, chances are you've seen a lot of code like this: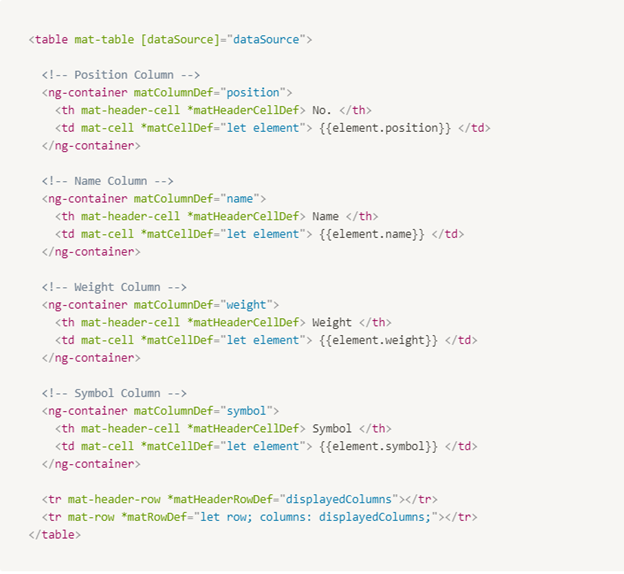
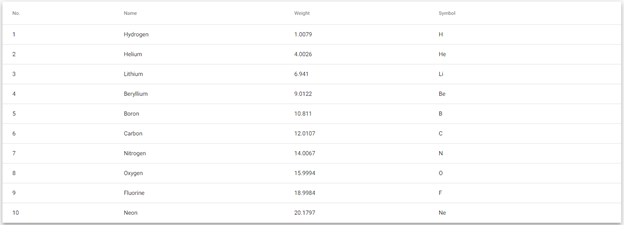
The code is a typical example of generating a table using Angular Material and will create the following table given a dataset.
This is great and works perfectly if you have a single table in your app. However, once you start adding several different tables, it quickly becomes clear that this code is just not DRY. You end up copy pasting a lot of the same logic and structure throughout your app, while only changing the domain objects and a few variables around.
In this article, we will explore how we can make our tables DRY by introducing dynamic components into our apps. You can access the example code used in the article here.
Why Dynamic Components?
Before deciding to explore dynamic components, you might question why you would need to use them in the first place. If you have simple tables in your app, you could easily get away with making a config object/file, and extracting a lot of the table generation logic in to a shared table component which takes in that config object/file. Such a config file might look something like this:
You can imagine how your shared table component would then loop through this config object to generate the above code. And can also take any other object with the same structure.
The problem comes when your tables are no longer simple. Perhaps you need some of your table columns to have components rendered in them, and not just plain text as their values. One solution would be to have an *ngSwitch which renders passed in components, but that quickly becomes a headache to maintain for every new component you add. Wouldn't it be nice if we could just make our config file take any component, with any inputs, and just render it magically?
This is where dynamic components come in! Using dynamic components will let us do just that, and by the end of the article, you'd be able to setup a config file that can take in any component, and pass it onto a table to render it.
For example, if we introduced a PeriodicElementDetailsComponent:
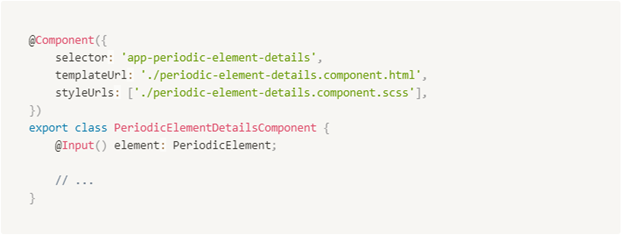
This component would render a component's details as if appearing on the periodic table - for example, passing in Iron (Fe), it would render the following:

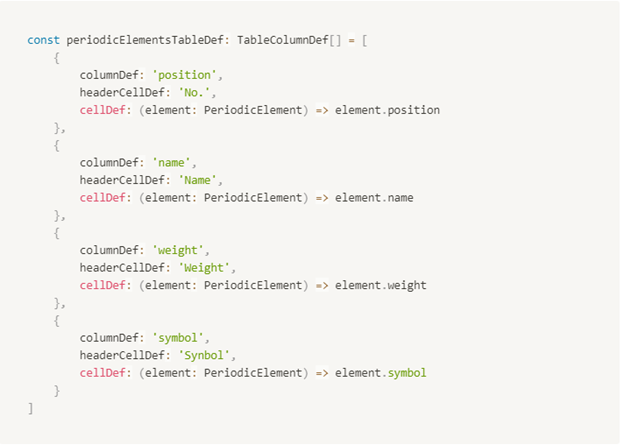
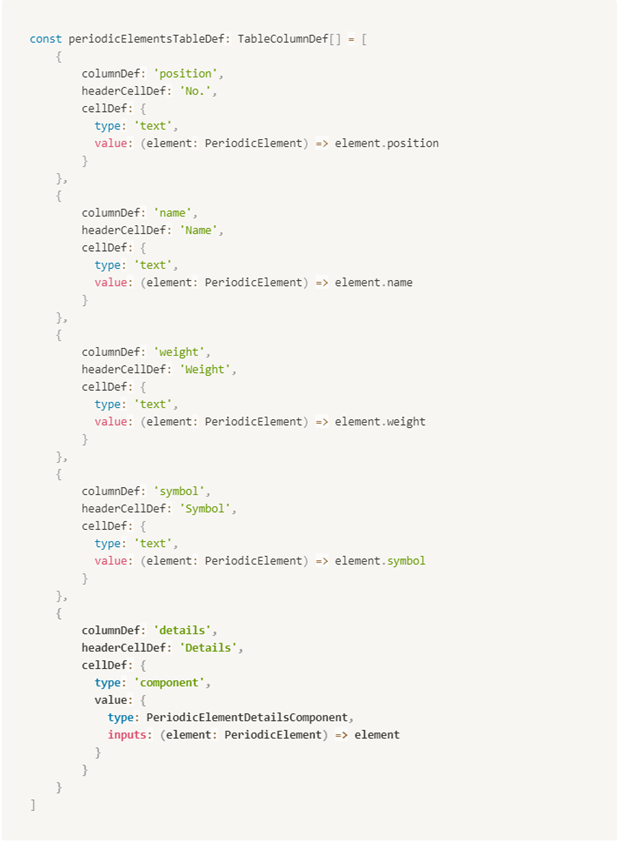
Then we would want to be able to render this as a part of our table in a dynamic way. Once everything is setup, our new config file would look like this:
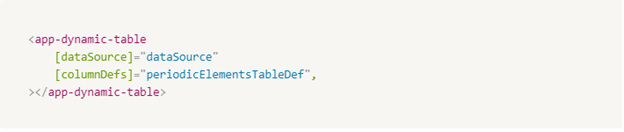
Eventually, we would be able to create a table with this config file format anywhere in our app with any data just like this:
And wWithout further ado, let's start learning about these dynamic components, and how they work, so that you can use this same pattern for other dynamic components, and not just tables!
Dynamic Components In Angular
In order to understand how dynamic components work in Angular, it's helpful to first look under the hood and understand how Angular generates components.
This is a very general explanation. If you're interested in more detail, check out the official Angular Docs on Ahead-of-time (AOT) compilation.)
ComponentFactoryResolver
In simple terms, for each declared component in your app, Angular creates a component factory associated with it. This means that in order for you to create a component dynamically, you need to have access to that component type's factory.
This is where the ComponentFactoryResolver comes in. This is a service used to obtain a factory for a given component type, and in turn can be used to create components of that type.
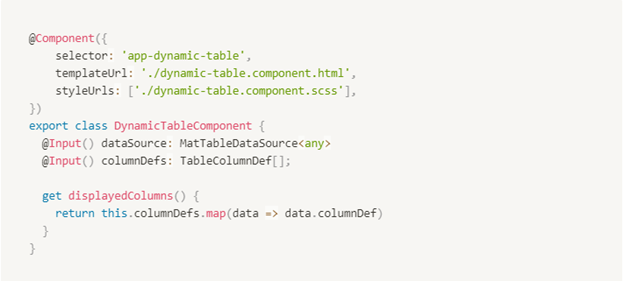
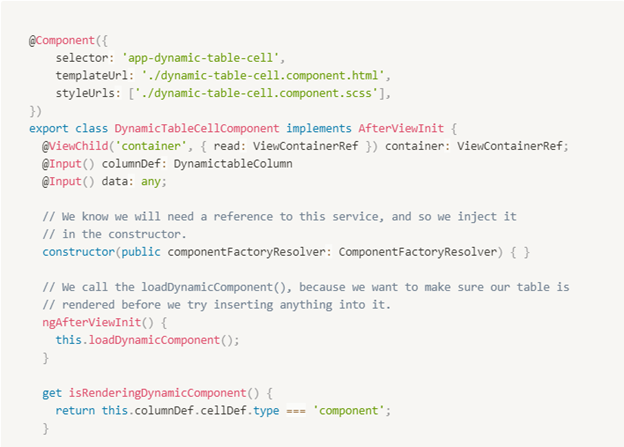
With this in mind, let's start building our DynamicTableComponent which also has a DynamicTableCellComponent as a part of it (which is where the magic happens 🙂)! We create a DynamicTableComponent, and define the inputs for a data source and our table config as we saw them used above.
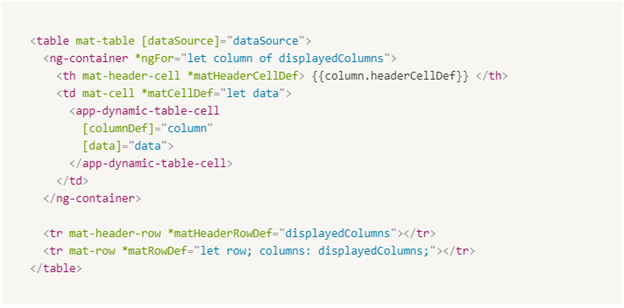
And our template would look as so:
Already much cleaner than before! But this isn't anything special outside of looping through a config file to generate a table.
Let's look at the DynamicTableCellComponent now. The DynamicCellComponent is where we will be doing the dynamic component generation. Since we know that we will be loading some components dynamically, and we just learned that we need a ComponentFactoryResolver in order to do that, we create our component with that in mind.
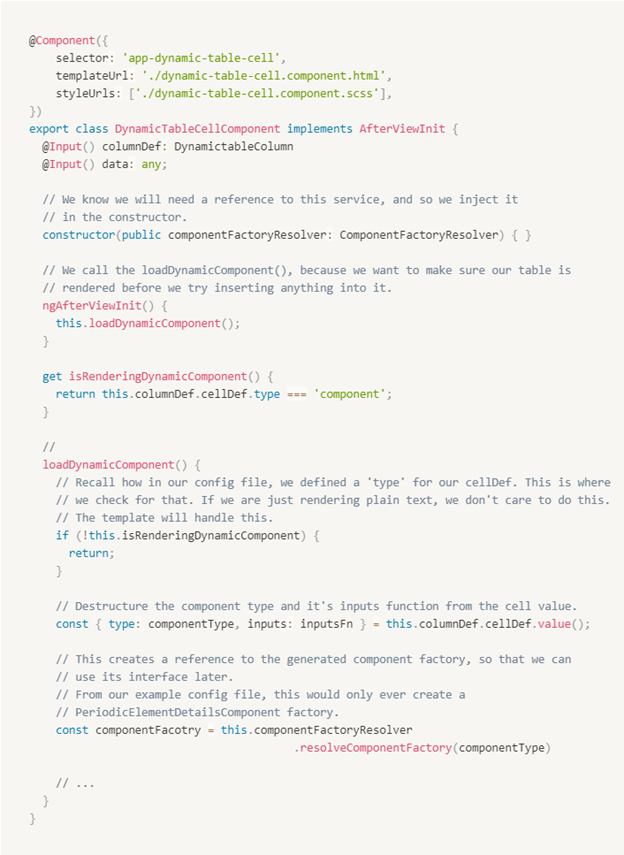
Notice inside the loadDynamicComponent method, we create a factory for the passed in component type from our config file. We will use this factory later to actually create an instance of that component.
Great! We now have a reference to a component factory which can be used to generate components of whatever type we've specified. Now the question is, how do we actually create and insert those components into our DOM? This is where the @ViewChild and ViewContainerRef come in.
@ViewChild and ViewContainerRef
In order for us to actually create a component of a specified type, we first have to tell Angular where in the DOM to place that generated component. We know we have our DynamicTableComponent which we can insert anywhere in our app as so:

We've sort of told Angular that this <app-dynamic-table></app-dynamic-table> is the container for where that DynamicTableComponent will go in.
Much like using a component in our HTML templates, we also need to define a container for our dynamically generated component. This is done in Angular using a combination of @ViewChild and ViewContainerRef.
We know that we need to define some place in our template(s) where we will want this dynamic component to be inserted. We also know that we will need to insert this component programmatically (dynamically) based on whatever config we passed.
We first define the place where we will want this component to go. In our case, this would be inside the DynamicTableCellComponent's template:
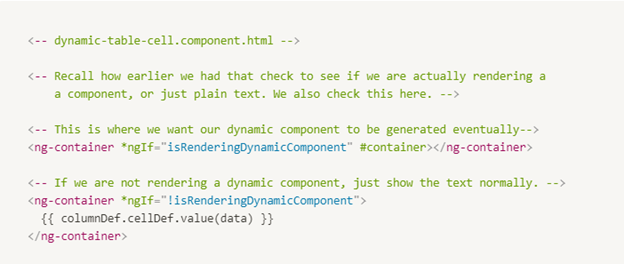
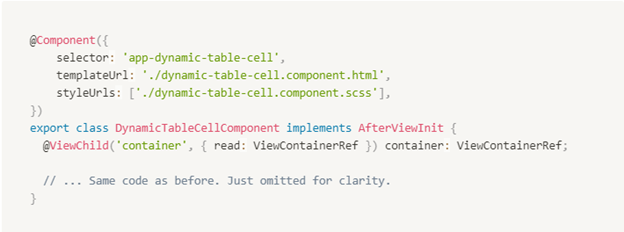
The container for our dynamically generated component in this example, now becomes the ng-container. (Note that the container can be any element.). In order to reference this container from our component, we use the "#" symbol to create a template reference variable named container.
In order to read this variable from the component, we use the @ViewChild decorator. This decorator effectively scans the component's template for the first element or directive that matches the provided name. In this case, we are scanning for "container". We also have to specify what we are scanning for. This is where the { read: ViewContainerRef } part comes in. We are specifying that whatever we just scanned, will be a ViewContainerRef, which in Angular, represents a container that we can attach multiple views to. In our case, we will eventually be attaching our dynamic table component to it.
Since we are creating a reference to a ViewContainerRef, this means we can use the methods it exposes to us. And one of those methods is the createComponent method which lets us create (or attach) a view to this container reference. This is precisely what we will do to create our component dynamically as so:
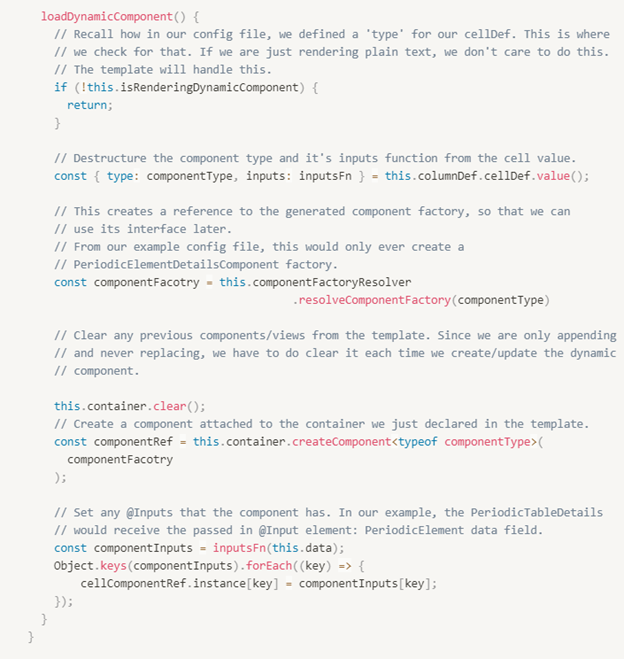
And this is really all it takes to start creating components dynamically in Angular. I've sprinkled the code with comments so that everything is clear.
You could use this pattern for anything that fits your use cases. Some more obvious examples would include:
- Tables
- Forms
- Alerts
- Modals
Once you know what's available, this dynamic component method allows you to reuse so much code, and in general keep your Angular code DRY.