- Tags
- Article
- DevOps
- CI/CD
- container applications
- elastic
Your AWS Elastic Container Service Tutorial
Recently, I've had the chance to fit all the pieces together by launching my own microservice architecture application on Amazon Web Services Elastic Container Service (ECS). Here I will walk you through that process, starting from environment set-up and finishing with a fault-tolerant, high availability application deployment.
Getting Into Containerized Applications
Building distributed applications is complicated. You've probably heard of Docker, Kubernetes, containers, repositories, microservices, and clusters. With all of these technologies and buzzwords, it's easy to start to lose sight of the forest for the trees. What do all of these things mean and how do I use them for my application?
Recently, I've had the chance to fit all the pieces together by launching my own microservice architecture application on Amazon Web Services Elastic Container Service (ECS). Here I will walk you through that process, starting from environment set-up and finishing with a fault-tolerant, high availability application deployment.
For me, ECS was a good place to start working with container orchestration systems because the GUI helps guide you through the configuration process in a step-by-step manner. The guard rails provided by the GUI help you configure all the required components and occasionally provide warnings when you've done something wrong.
After you've set this up in GUI, you'll probably want to migrate to using configuration files over the CLI. You'll have the benefit of recording your implementation in code and, if you use source control, tracking your changes over time.
Click here if you're interested in launching your application in Elastic Kubernetes Service.
What Is Elastic Container Service
ECS is a managed container orchestration system provided by AWS. ELI5 - ECS is a program that monitors a group of computers and starts containerized software on those computers based on user specified parameters.
A few desirable features of ECS include
-
No additonal charge for ECS beyond the amount paid for compute resources.
-
Control of the ECS cluster can be done through a web-based GUI or the command line interface.
-
Integration with Identity and Access Management and other AWS services.
An understanding of some ECS concepts is required before we jump into the tutorial.
-
Task Definition is the combination of a container image and its runtime parameters.
-
Task is a running instance of a task definition
-
Service runs and maintains a specified number of tasks
-
Cluster A logical grouping of tasks and services combined with a compute resources called a service provider.
Getting Started
If you haven't already, click here for instructions on how to set up your AWS environment.
Procedure
Start by logging into the AWS Console and selecting Elastic Container Service from the Containers section.
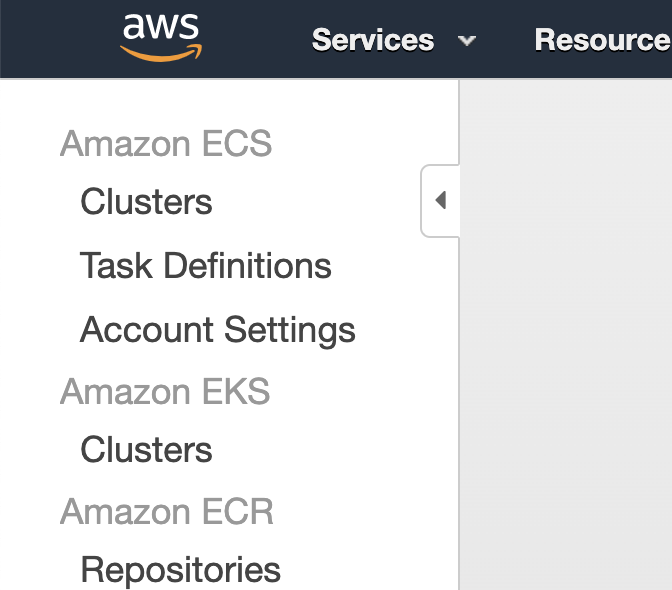 ECSConsole: img/ecs-console.png "The left pad in the ECS console"
Task Definition
We'll start by creating task definitions for our services.
Next select create new task definition
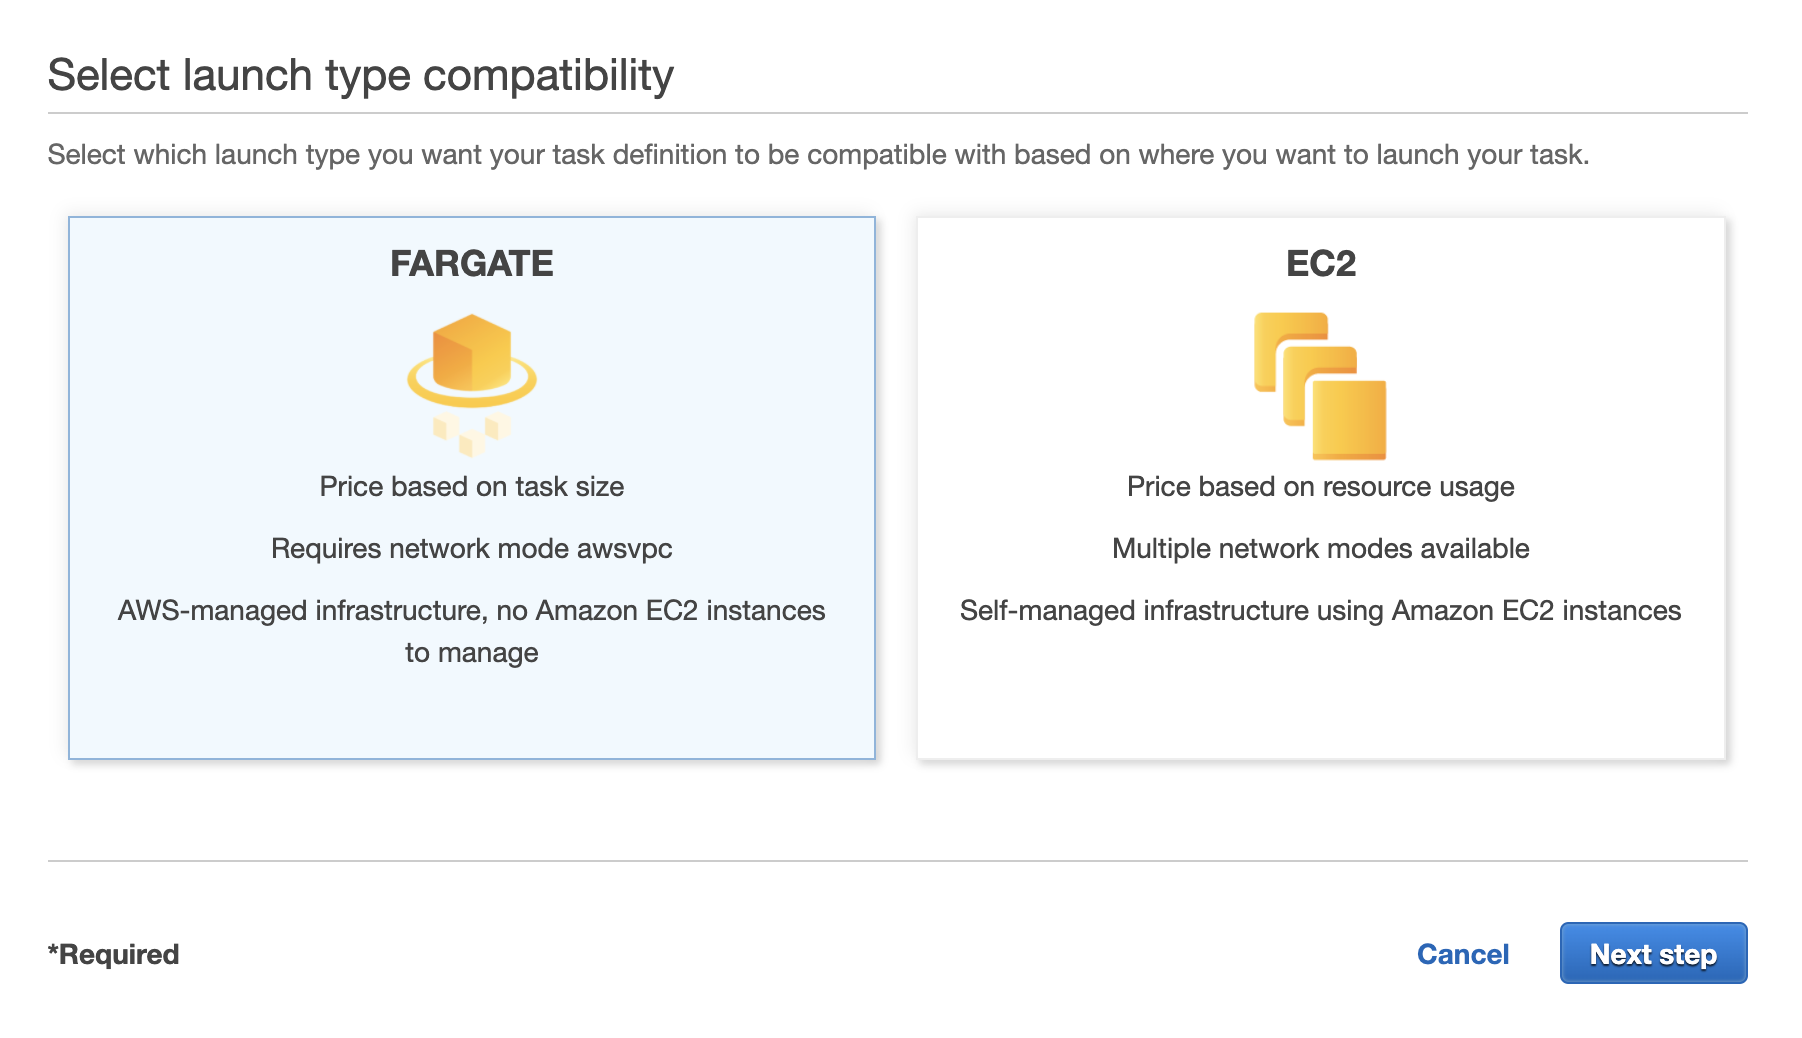
Here we have to choose if we want our task definition to be compatible with serverless compute resources (Fargate) or traditional virtual machines (EC2). Since serverless is differentiator for ECS, lets select Fargate.
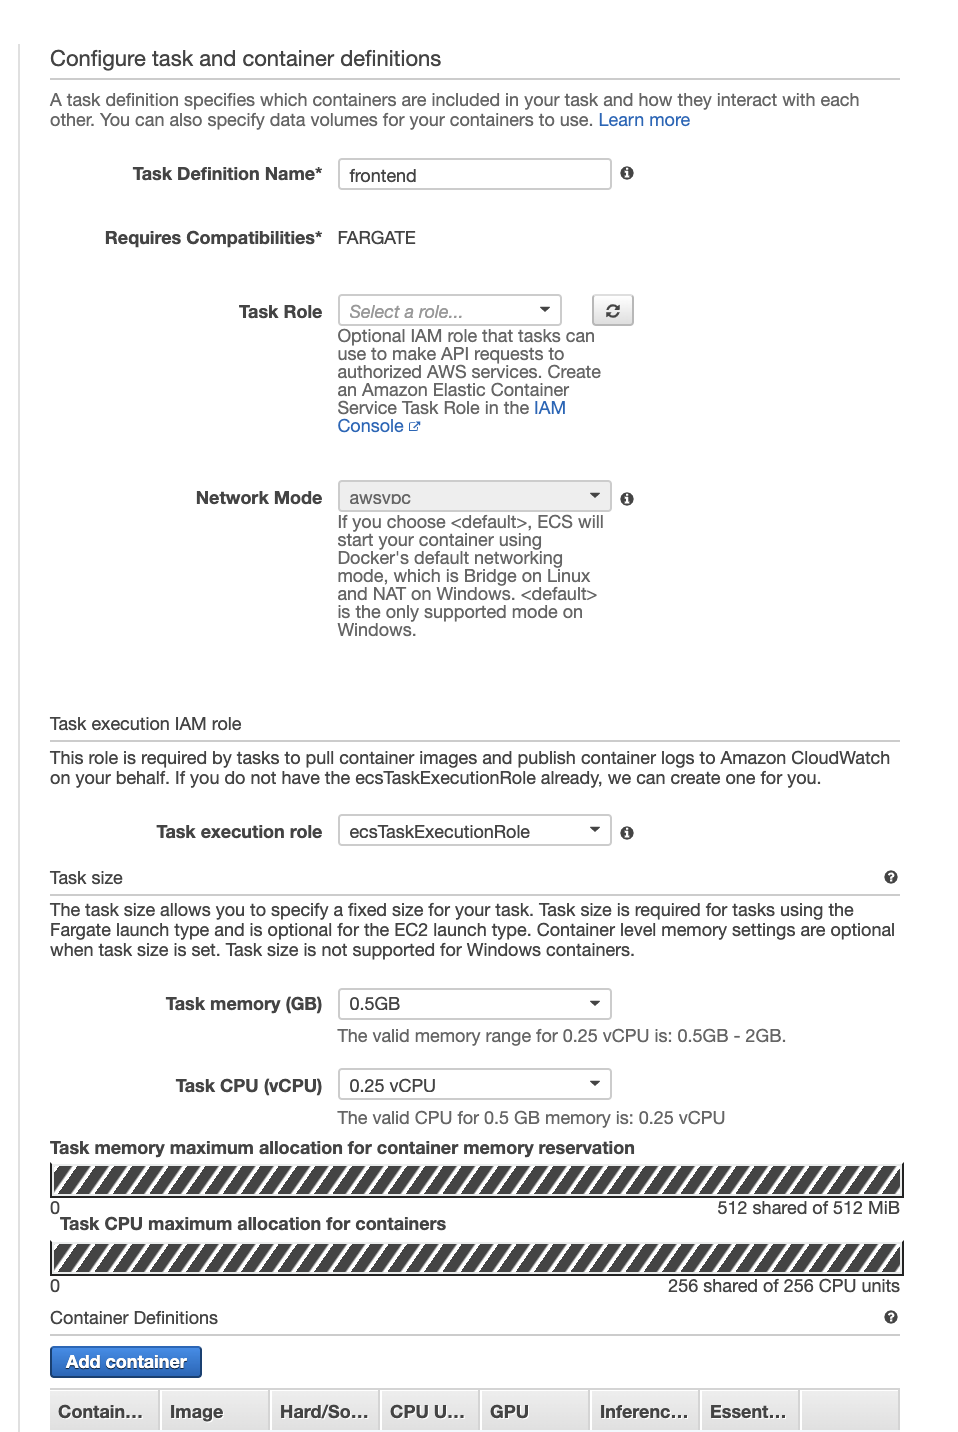
On this first screen we are selecting parameters that will apply to the task itself.
Name your task definition frontend and don't bother assigning it a role. We will not be using this task to modify other products within AWS. If this task were to access other services, like a database, we would need to assign it a role with the appropriate permissions.
Our tasks our small, so select the smallest values for Task Memory and Task CPU that you can. This will decide the size of the fargate machine your instance runs on.
Select Add Container
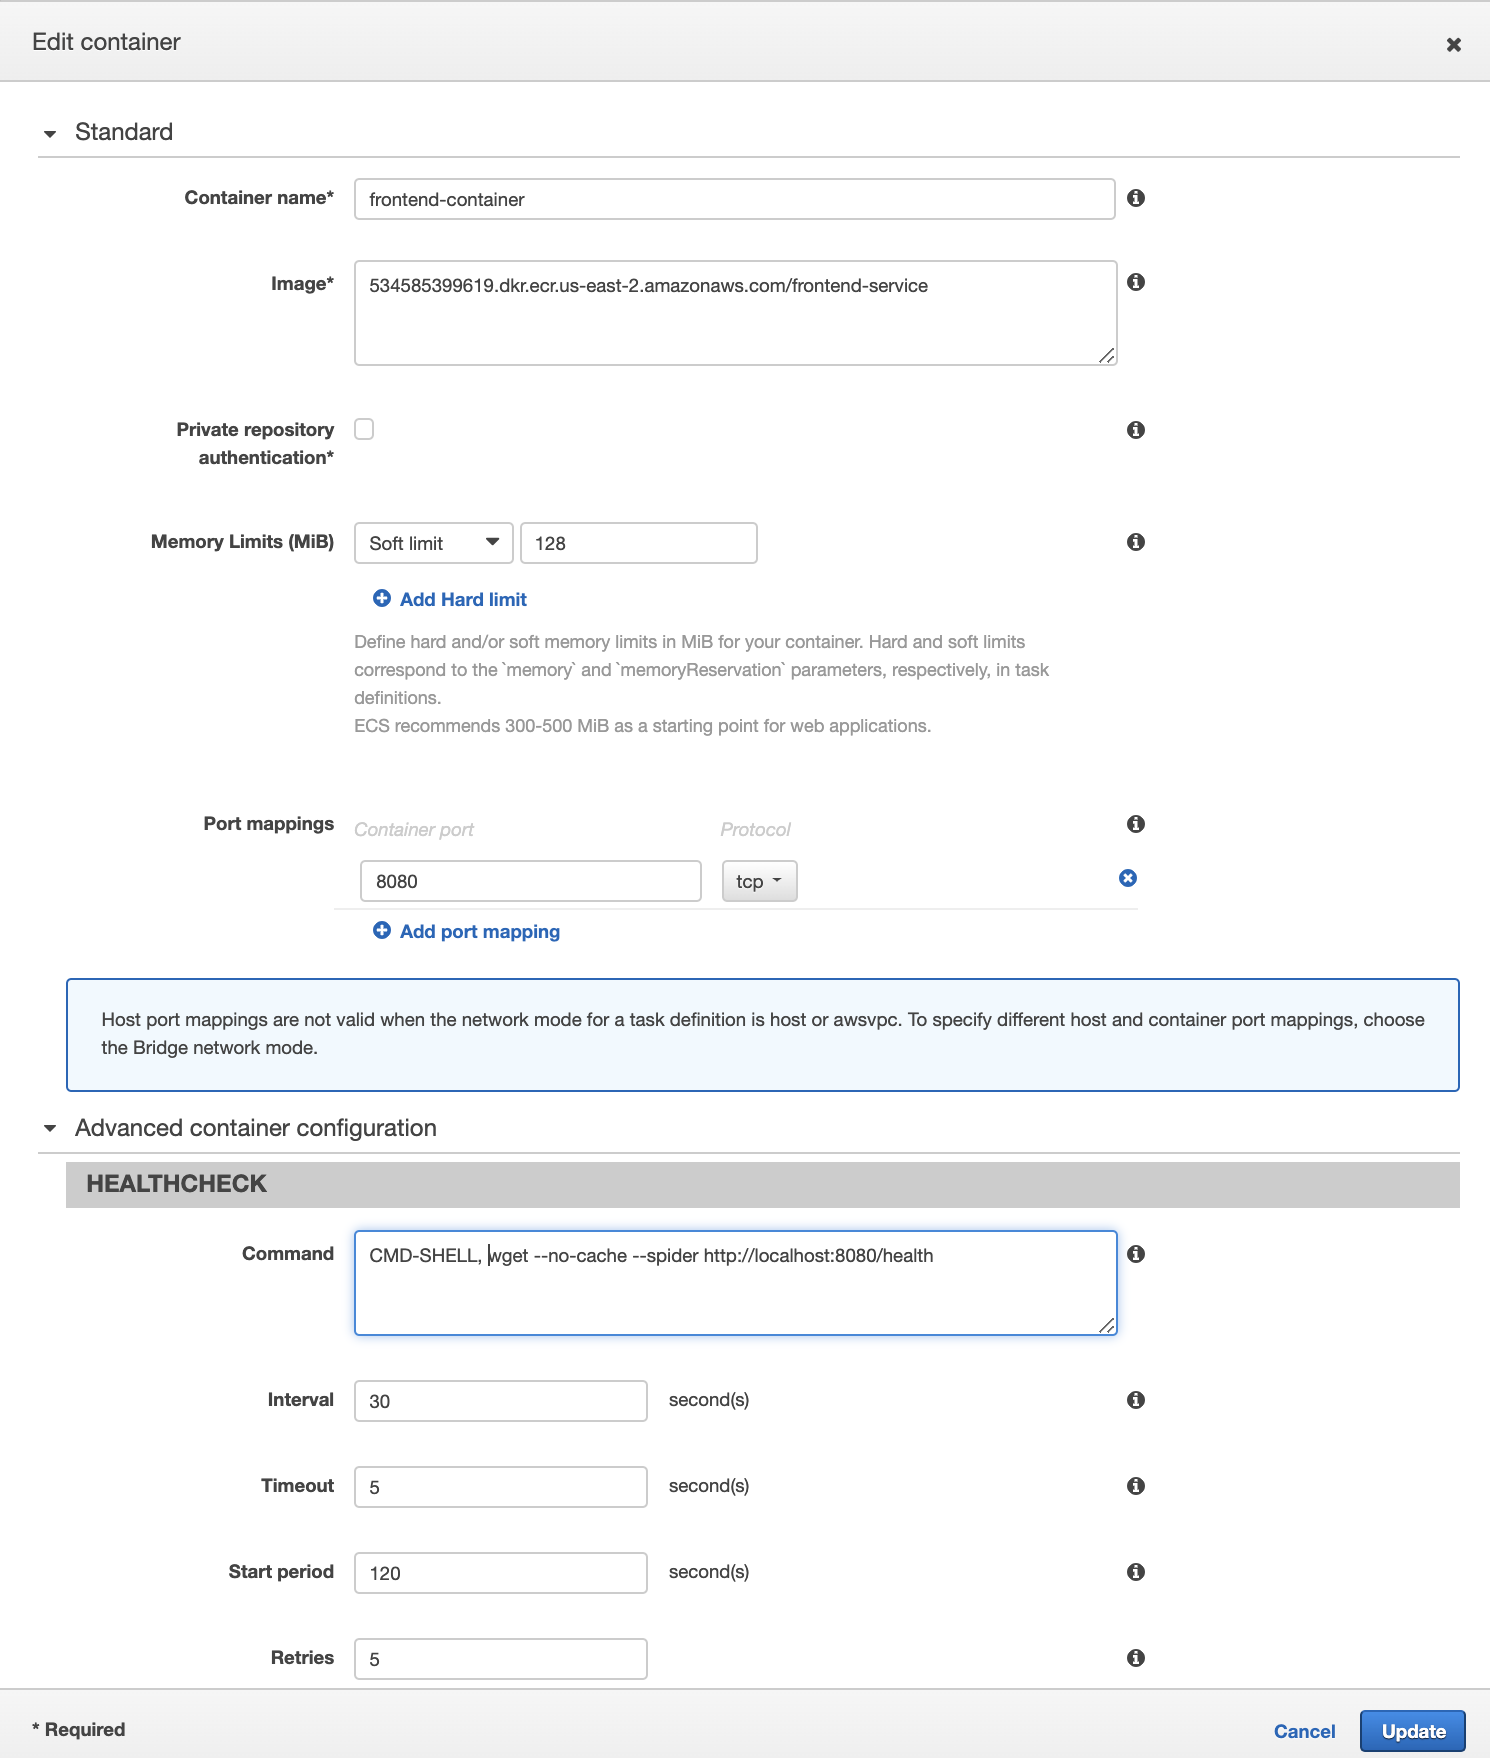
Now we describe the parameters for starting our container. These are the parameters that you would enter if you launched with docker run on the command line.
Name your container, I named mine frontend-container, and provide the URL for your container from the Elastic Container Registry (your URL will be different than mine). The memory field is required, and must be less than what you supplied for the task. I filled in the default of 128. Our Spring Application is exposed on port 8080, so fill that in under port mappings.
The health check section defines a health check that runs inside the container to determine if it is healthy. If the container ever registers unhealthy, ECS will stop the container and relaunch it. Our container holding spring MVC doesn't have curl, so we'll try with wget.
wget --no-cache --spider http://localhost:8080/health
which will exit gracefully with exit code 0 if it is a successful http call or with code 1 if it is not. Start period is the amount of time that is given to the container to warm up before the health check is performed. 2 minutes is enough for this application.
Follow the same procedure to create the backend container task definition.
Create a Cluster
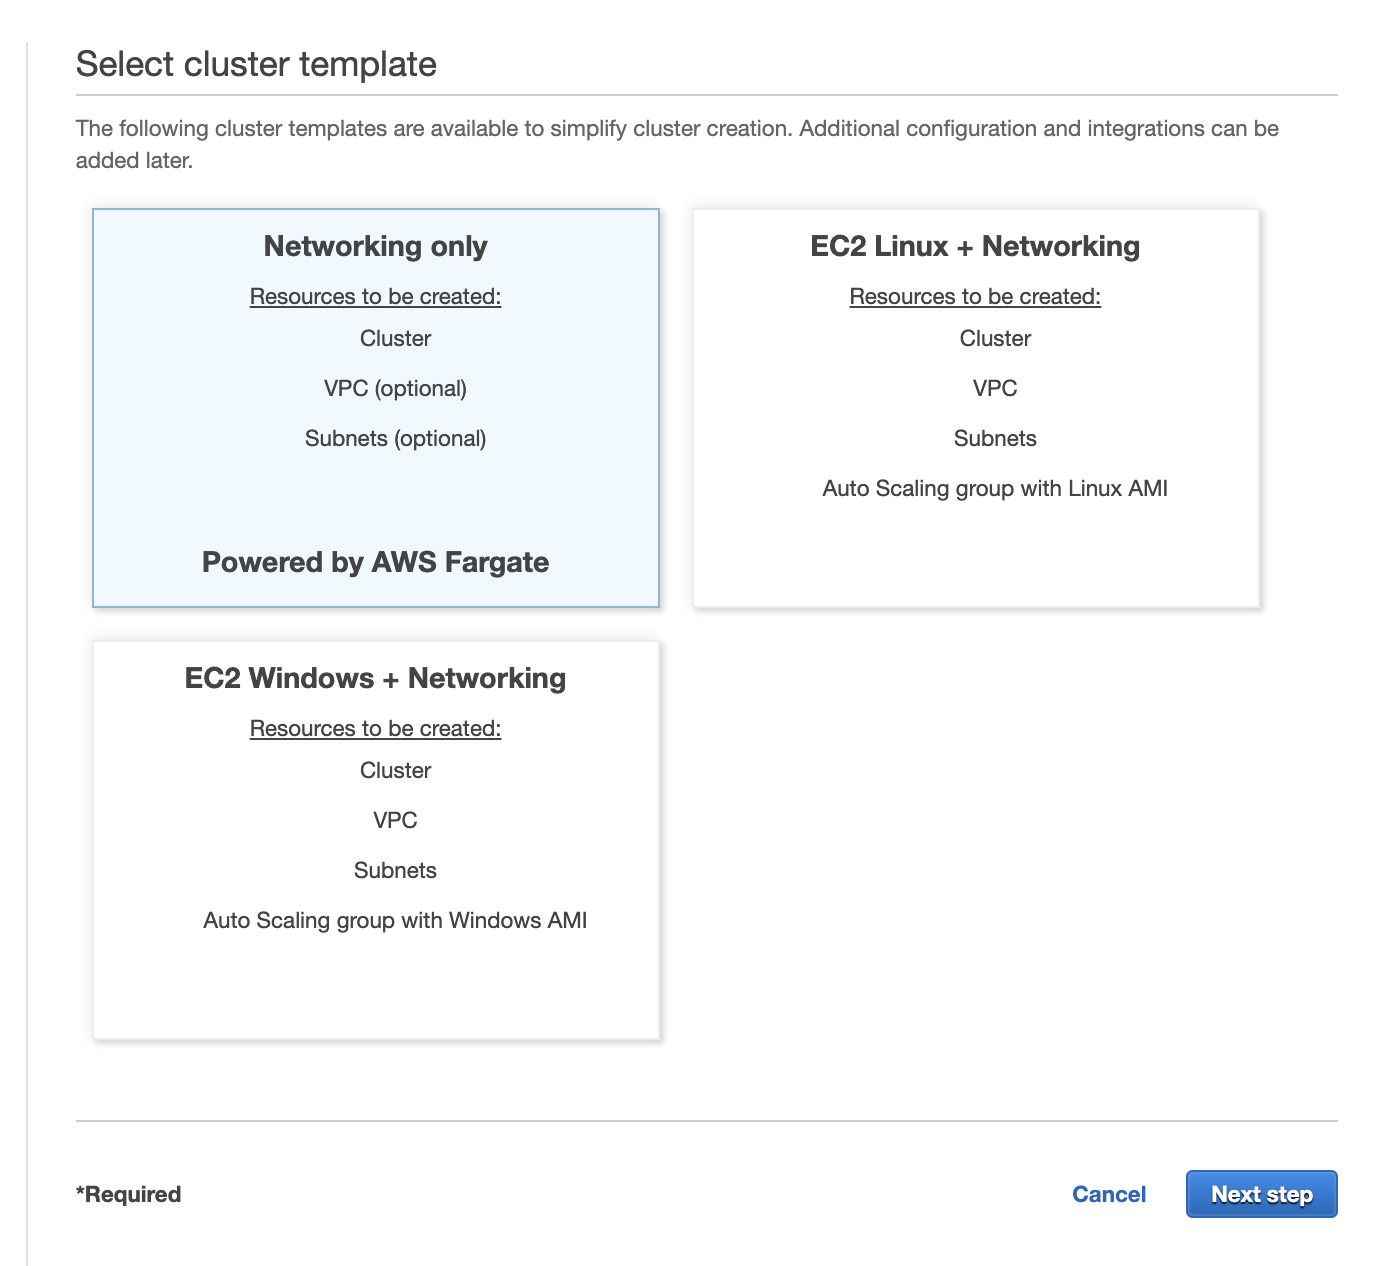
Creating a cluster in ECS is dirt simple. In the navigation panel on the left side of the screen select "Clusters" and then Create Cluster
Select networking only and name your cluster. Mine is called web-application
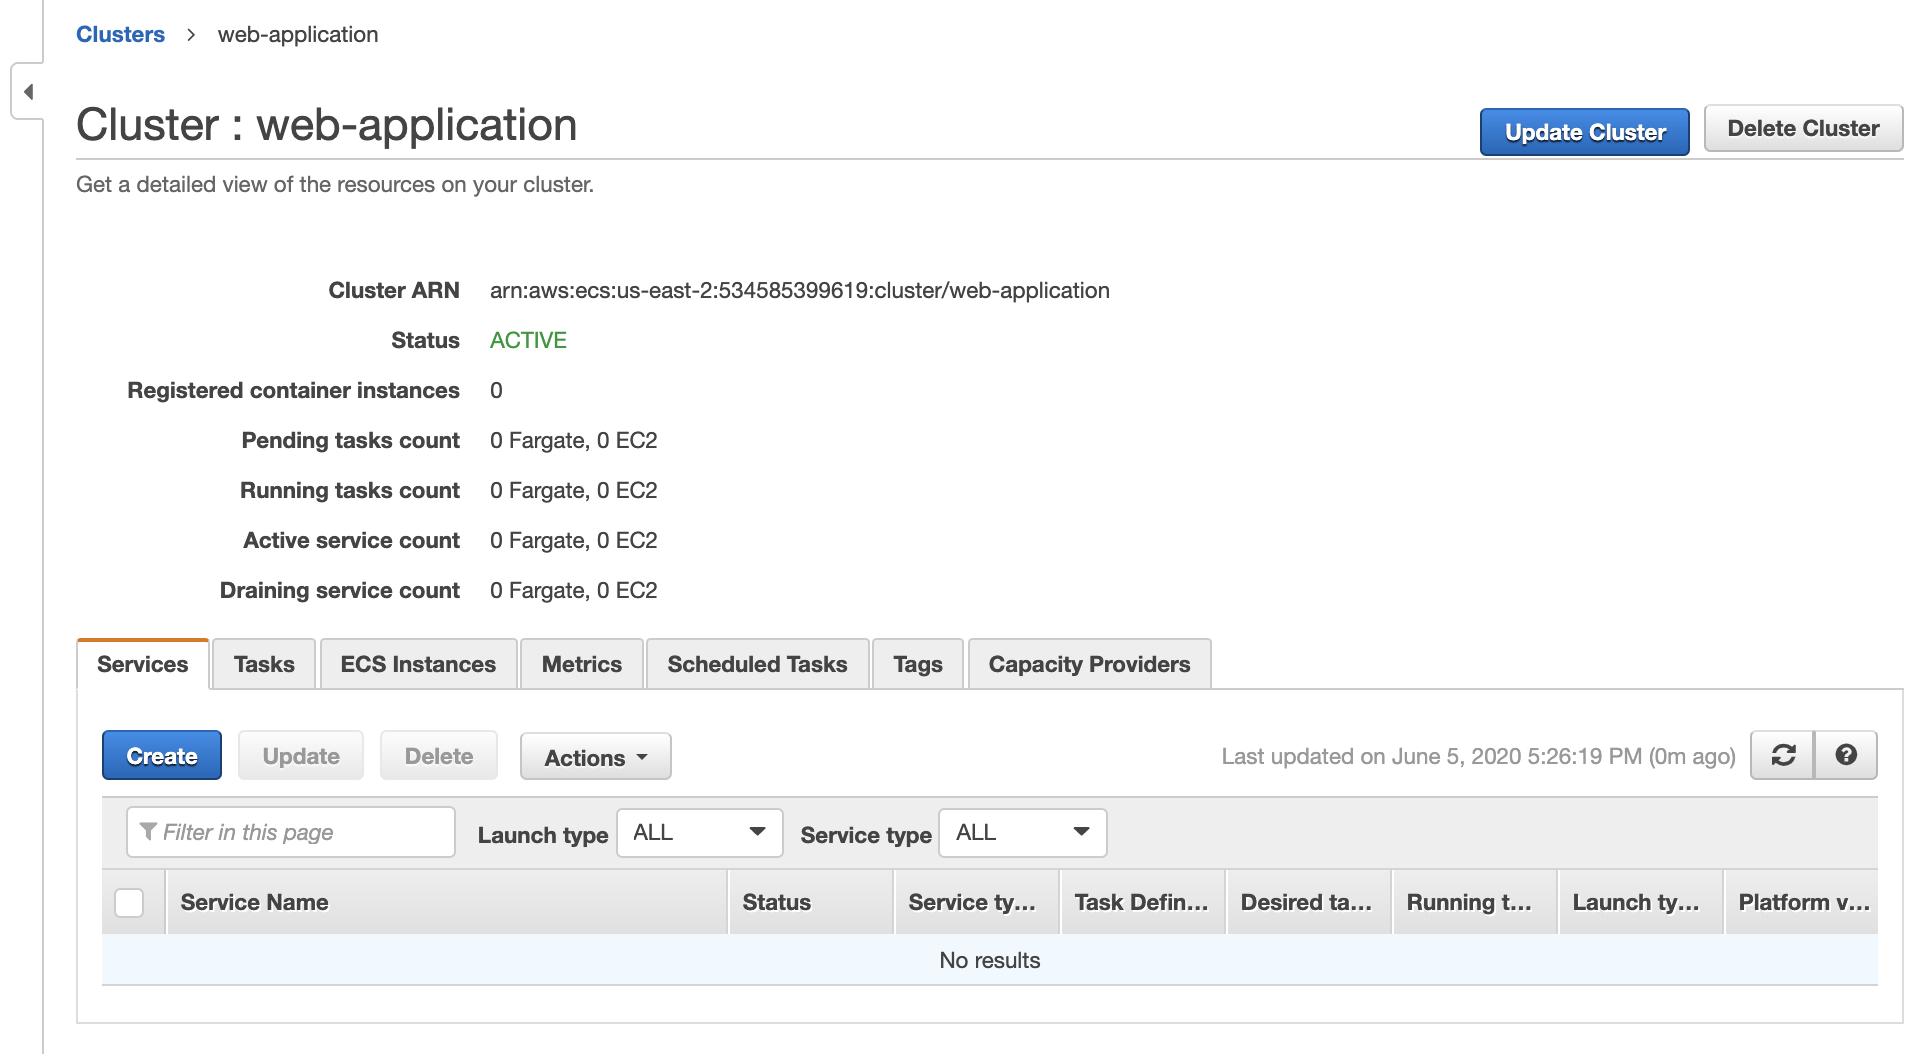
When you finish you should arrive at a screen that looks like this.
Define Services
Amazon defines a cluster as the grouping of a service and a compute resource called a service provider. When we created the cluster we selected fargate as our service provider, but we have yet to create a service. We'll start by selecting our cluster, and on the next screen selecting create under the services tab.
We start by creating the front end service.
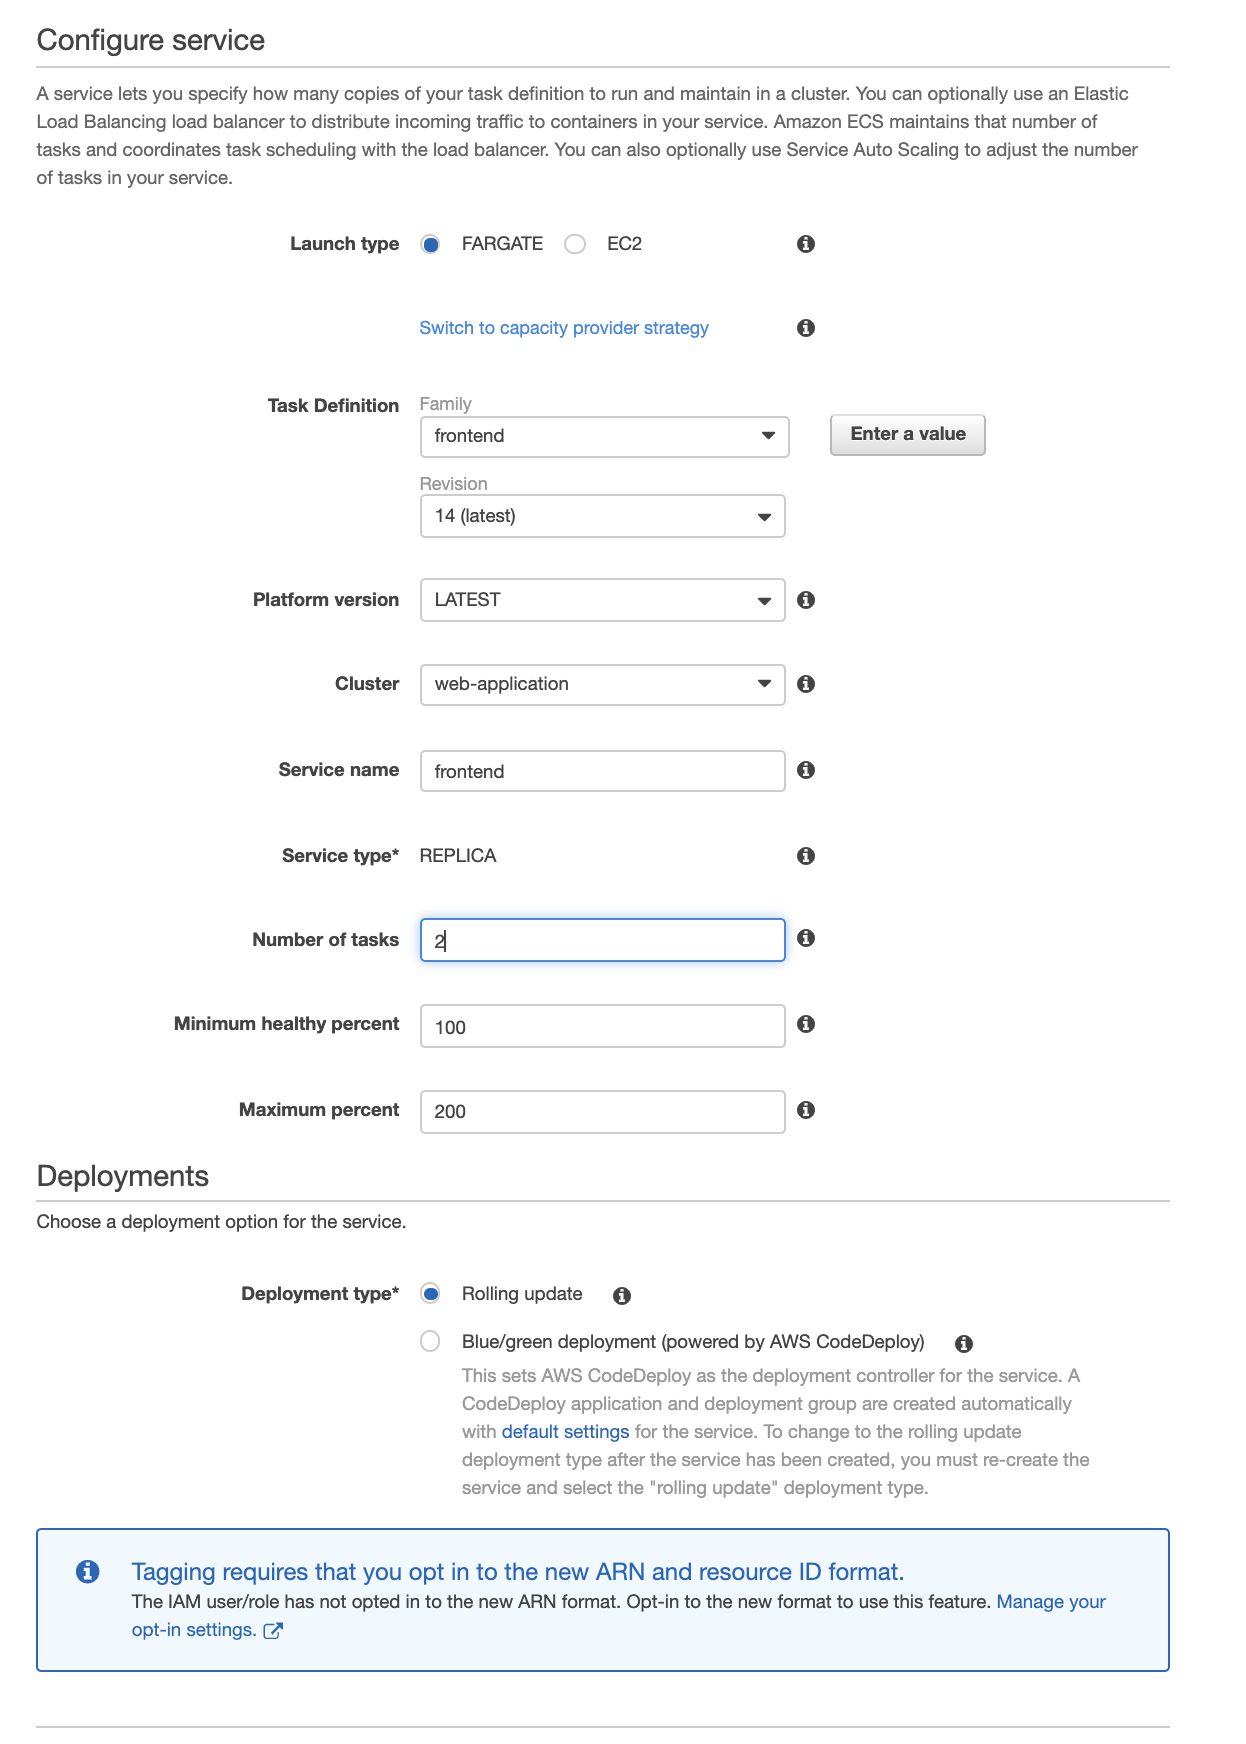
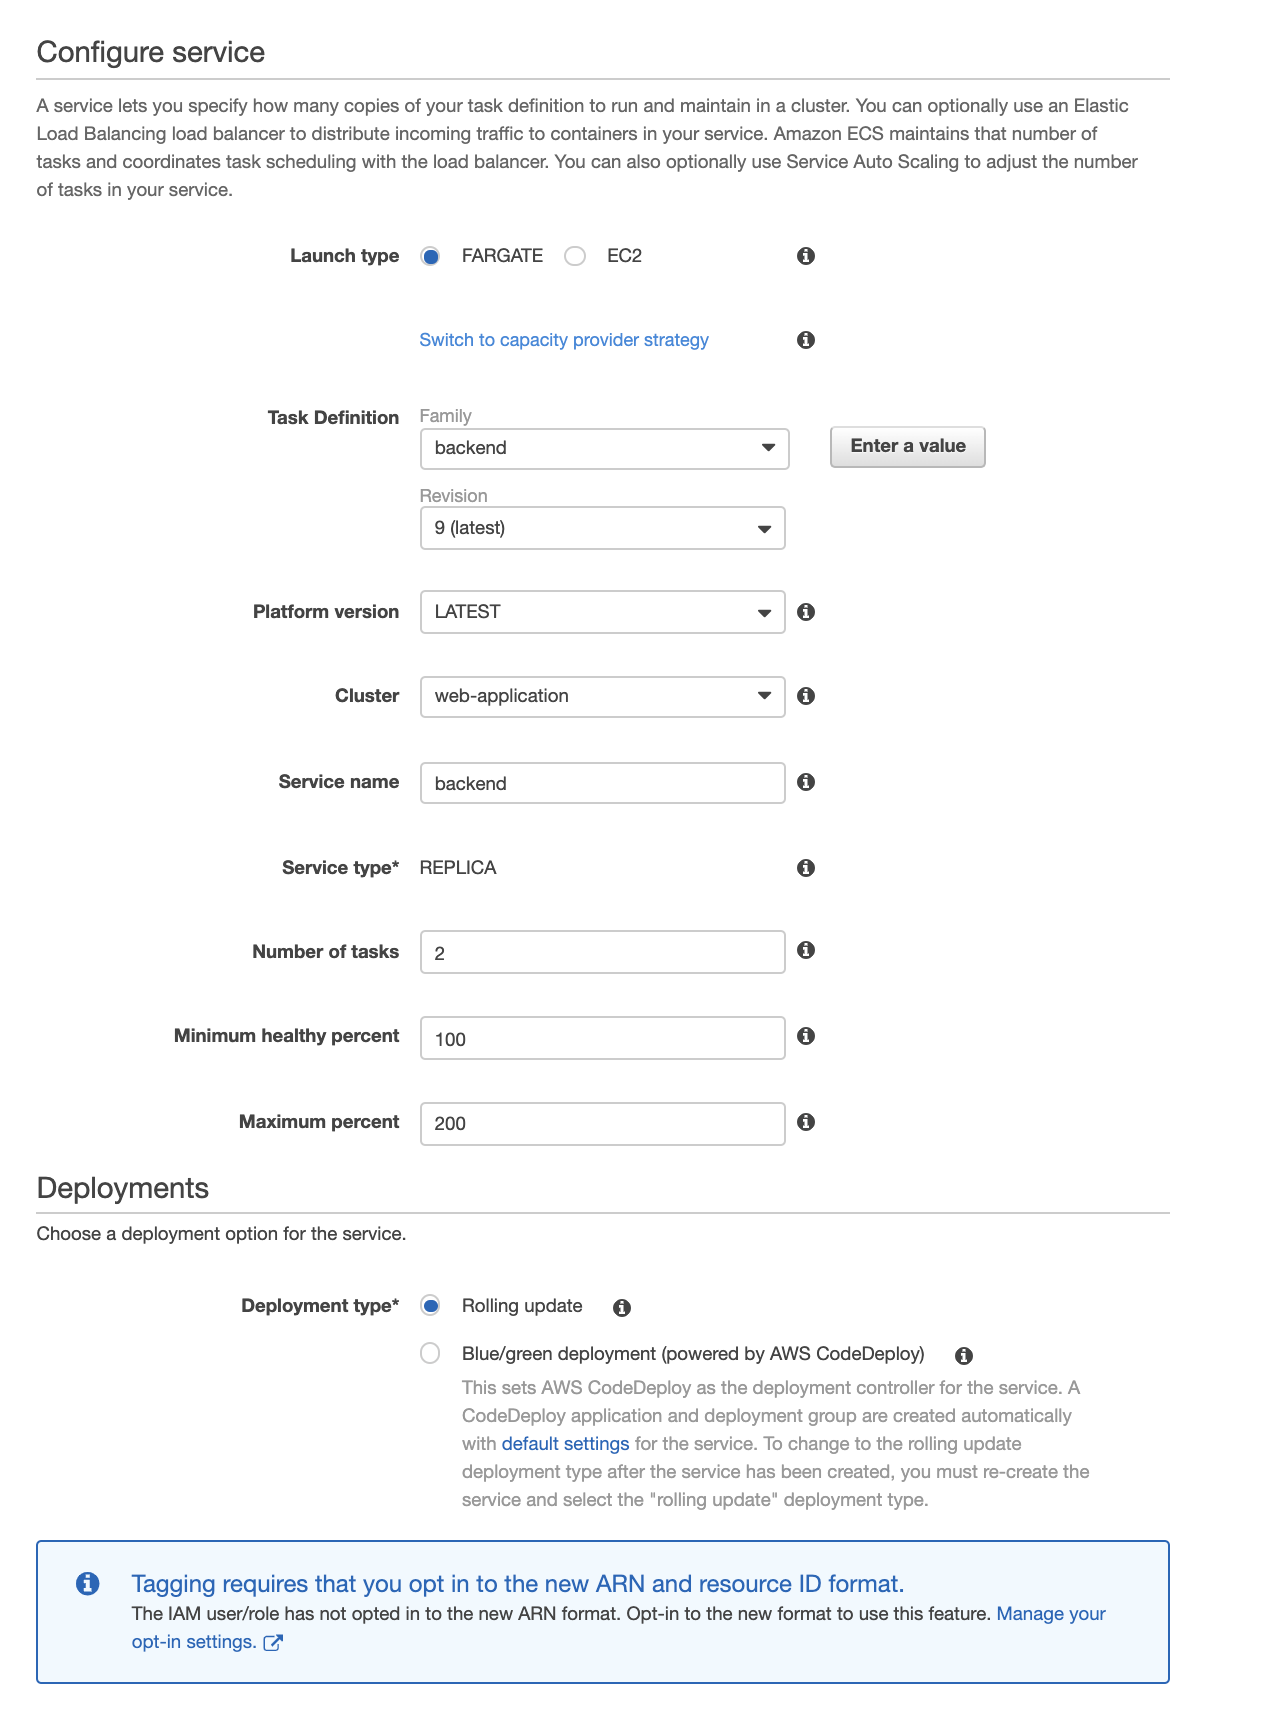
Select launchtype Fargate and the current revision of your task. Name your service. Next we will select the number of tasks, this will be the number of replicas of your container running at a given time. For our high availability application we will select 2, one in each availability zone. Scroll to the bottom of the page and select next step.
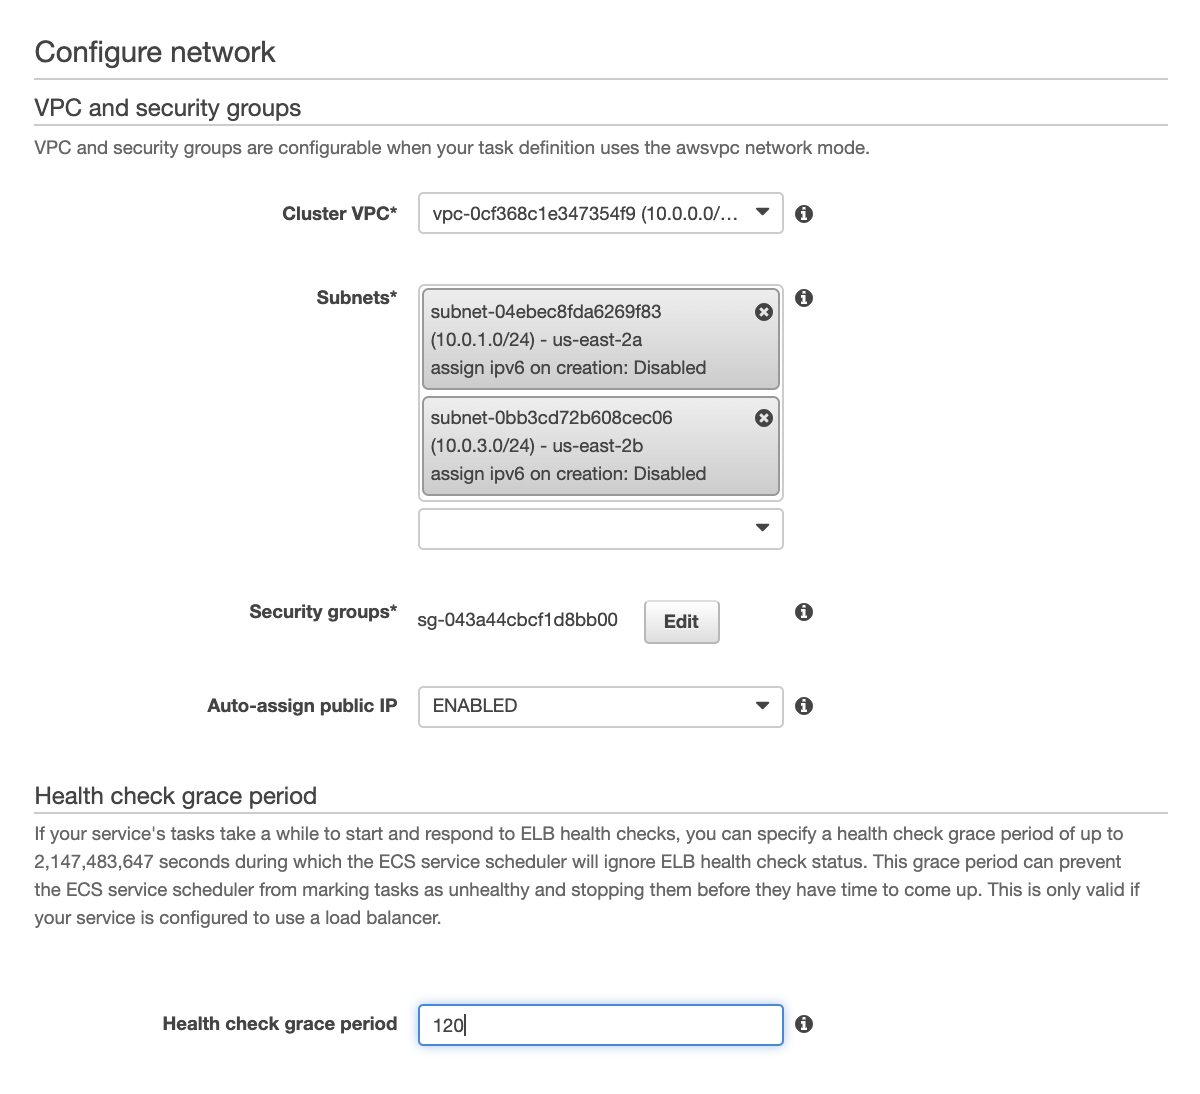
On this page we configure the service within our network. Select the VPC created by the cloud formation script. The subnets for our web-facing service are given CIDR blocks 10.0.1.0/24 and 10.0.3.0/24. Select those for our front end service.
Security groups in AWS define the allowed ingoing / outgoing traffic to a resource. Our Cloud Formation script has set up a security group called "WebFacingSecurityGroup." Select this security group for the web-facing application.
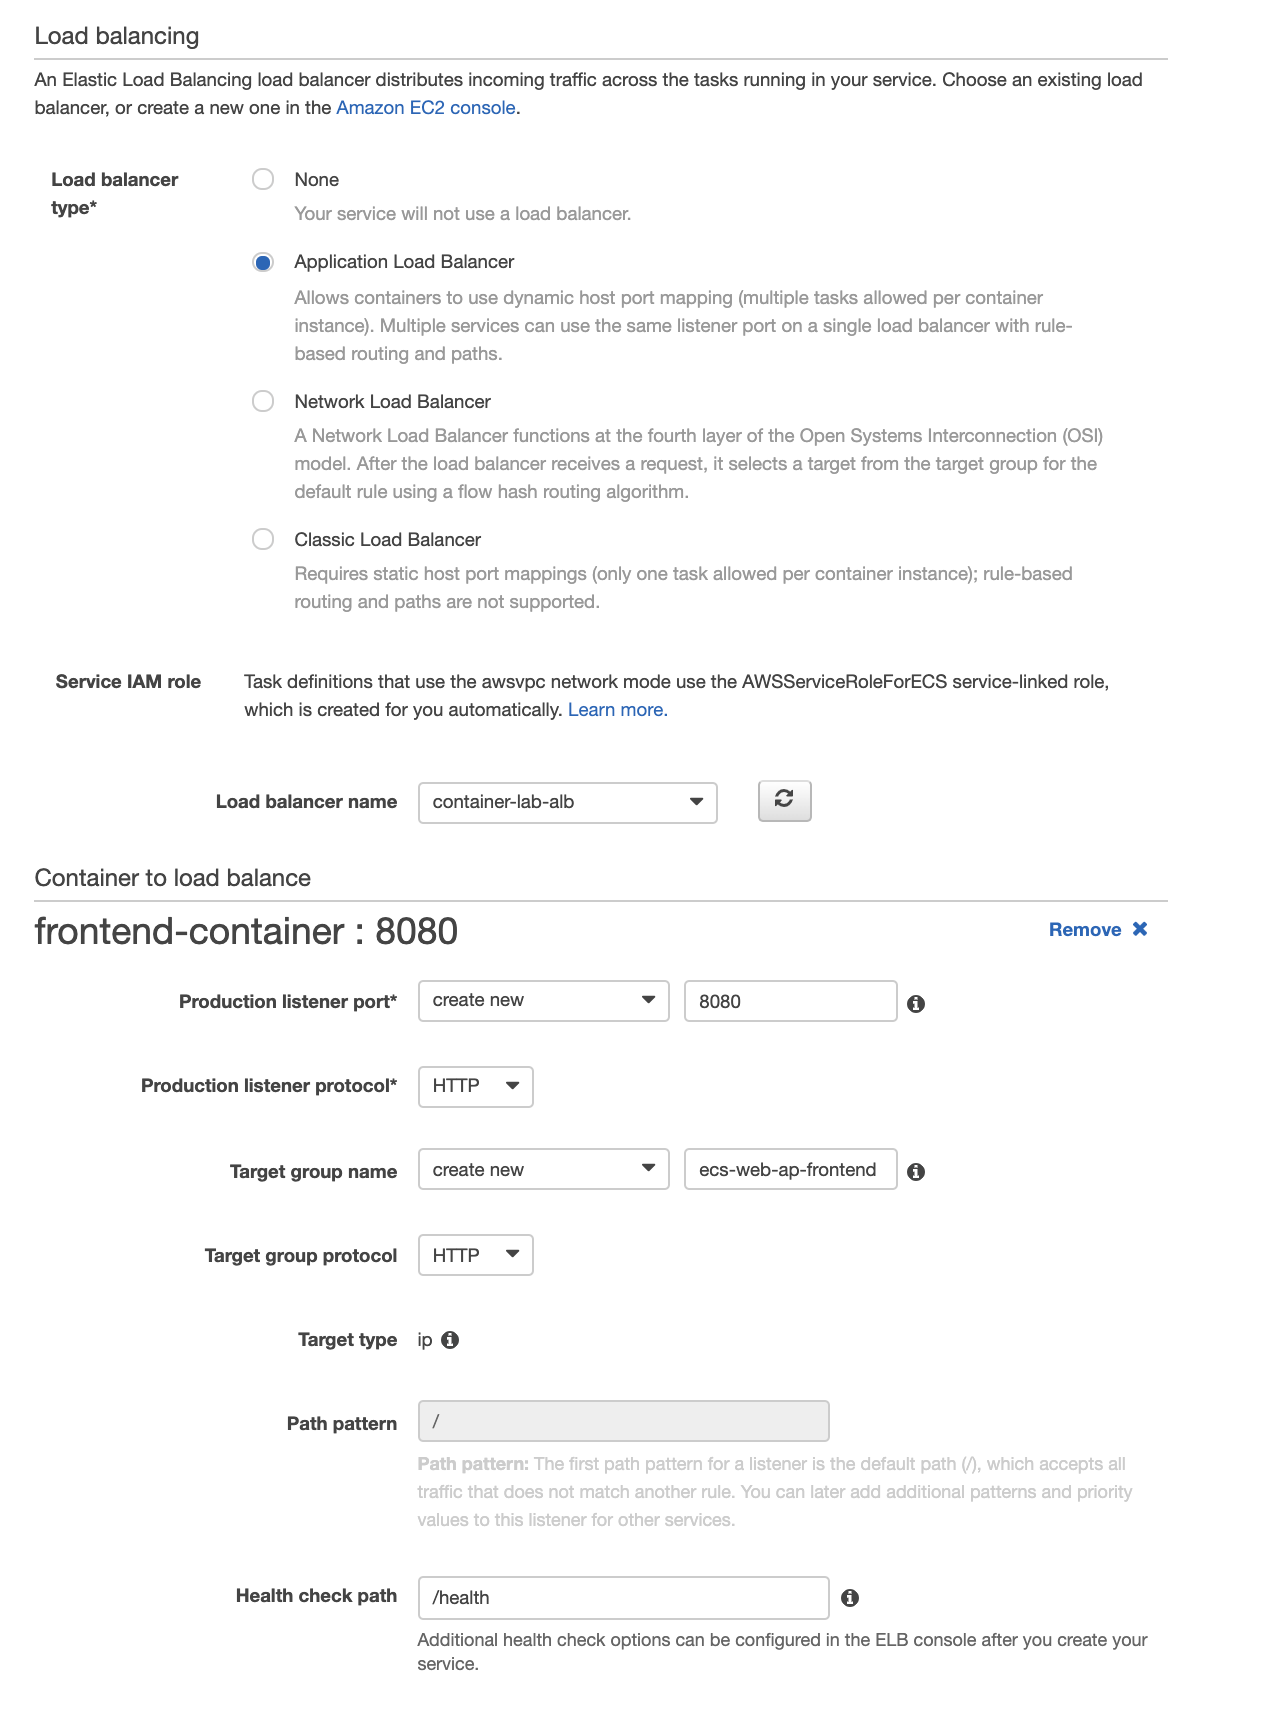
The frontend service will sit behind an application load balancer. With this configuration we can provide a single endpoint for the API but automatically provide access to available services. Under Load Balancing select Application Load Balancer and attach the load balancer created by our script, container-lab-alb. Confirm that the Container to Load Balance is your frontend-container and select add to load balancer.
From here we need to configure the load balancer. The production listener port should be 8080. The health check path is /health.
Check the section entitled Health Check Grace Period. Now that we have a load balancer this section is enabled. This parameter defines how long the load balancer will wait after service instantiation before it cuts out a non-performing service - we need to give our services time to boot up. I selected 120 seconds.
My page looks like the following when complete.
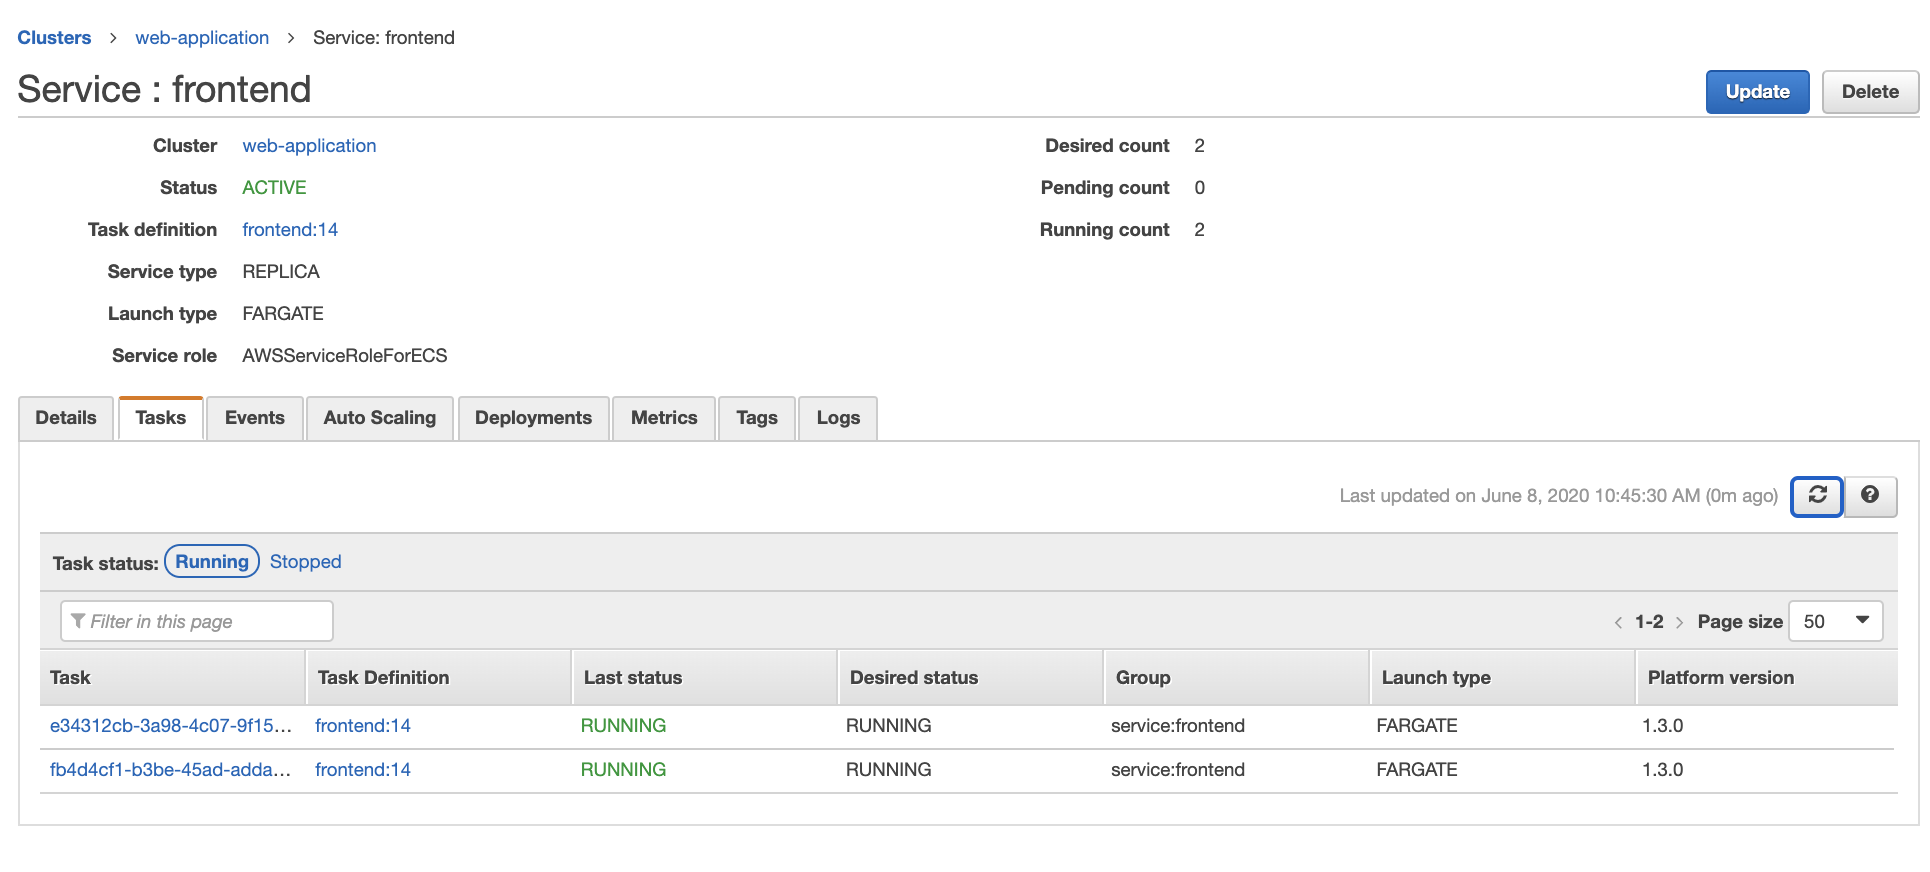
Skip over autoscaling for now. And select create service on the confirmation page. Click view service on the startup page. Refresh the service info page after a few seconds and should find under the tasks tab that two frontend services are running.
We can validate that the service is running form our desktop. First, lets get the url to our load balancer from console -> ec2 -> load balancers. Copy the Load balancer's DNS name from the description for container-lab-alb.
Open your terminal and type:
curl http://<alb-dns-name>:8080/health
Which should return true if the service is up and running.
Now we configure the backend service. Step 1 is the same as the frontend service except we name our service backend and select the backend task definition.
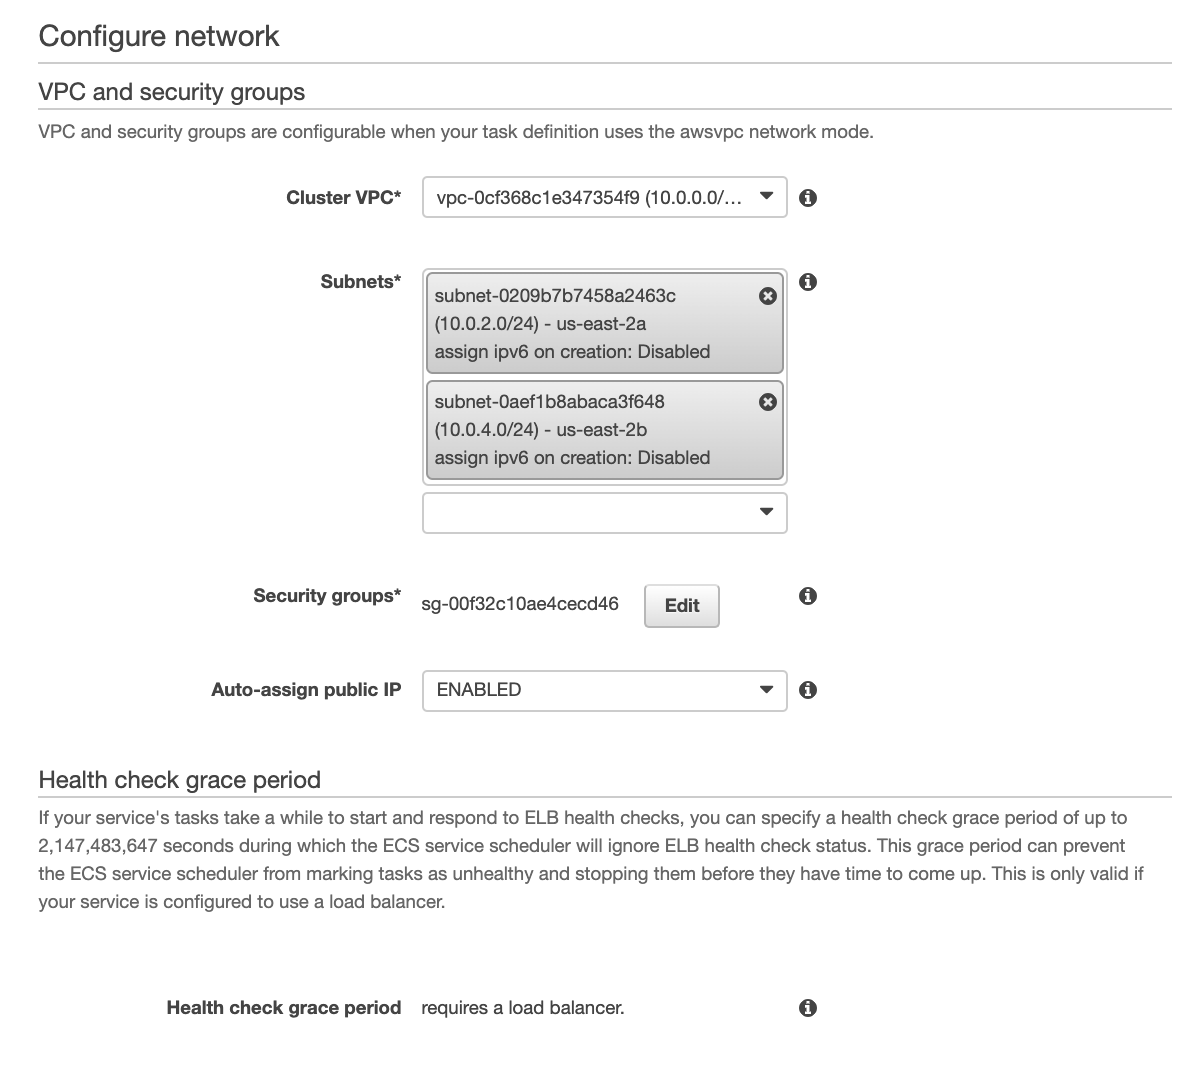
Under network, we'll select the same VPC, but now we'll deploy to the private subnets with CIDR Blocks 10.0.2.0/24 and 10.0.4.0/24. Apply the private security group created by the cloud formation template.
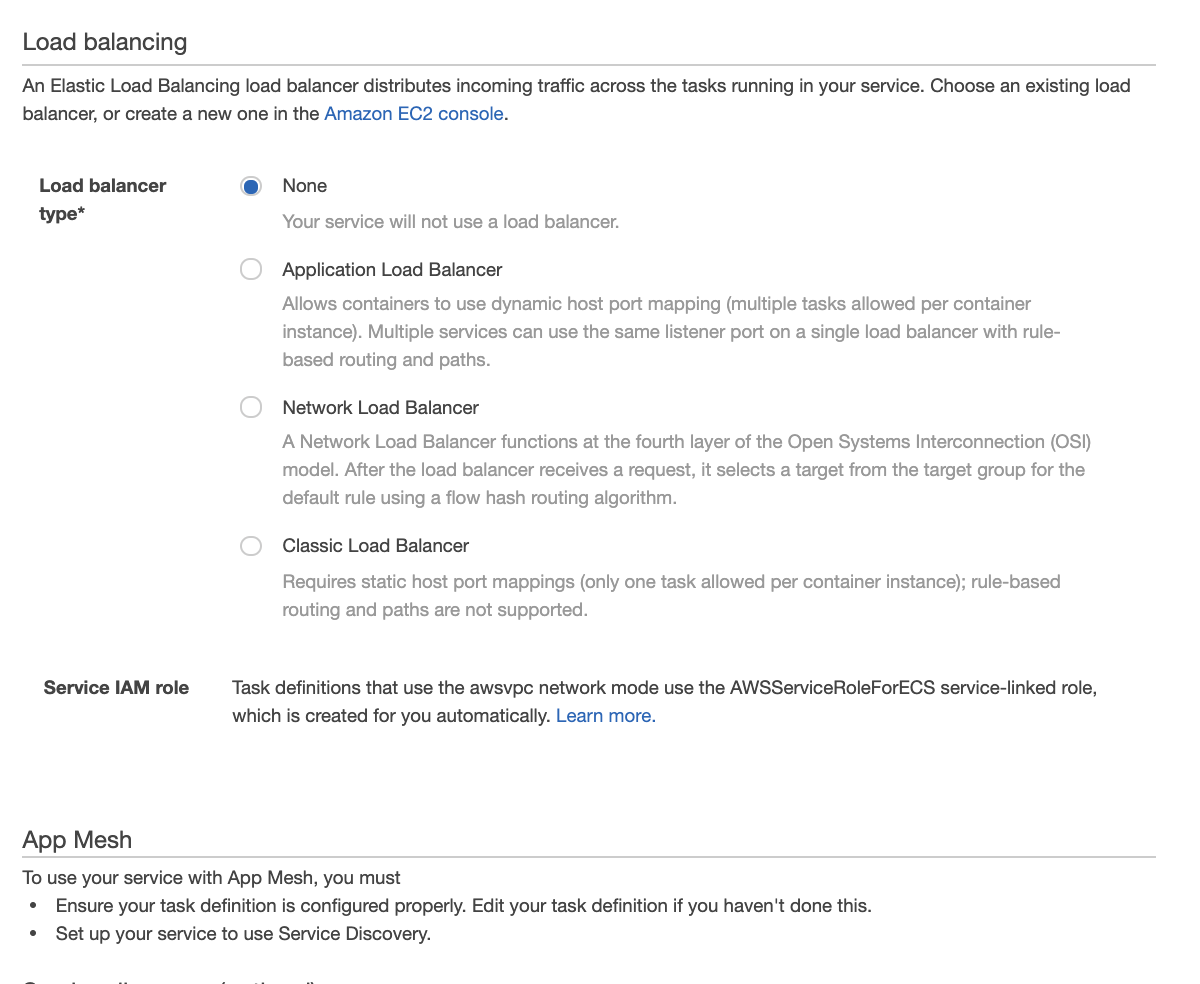
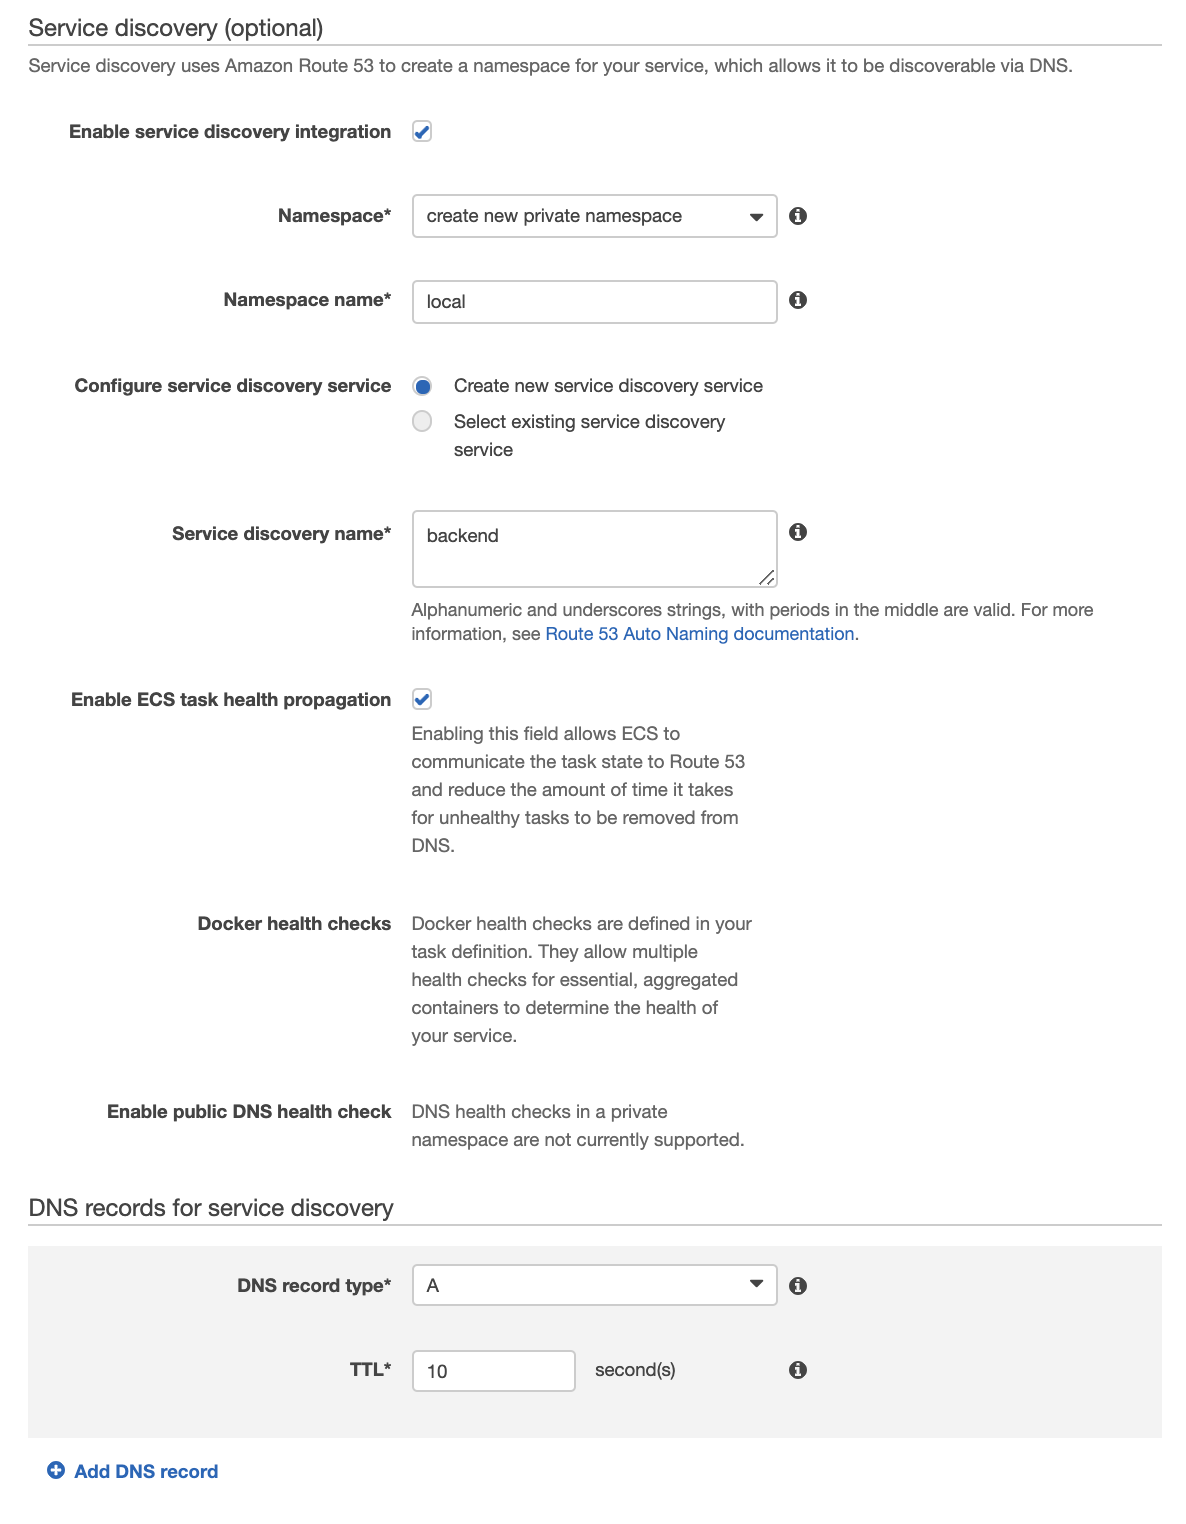
For our backend service we will use the service discovery functionality instead of the load balancer to provide a name for our service. Tick the box "Enable Service Discovery Integration." If you have no existing namespaces you will select "create new private namespace" and then select a namespace name. We'll stick with the default "local" for this lab.
The service discovery name must be "backend" because the url for the backend service is hard-coded as backend.local in the frontend service.
We want to enable the ECS task health propagation. This enables failed services to be quickly removed from the DNS.
Finally, select the TTL for your DNS records. I set it to 10 seconds.
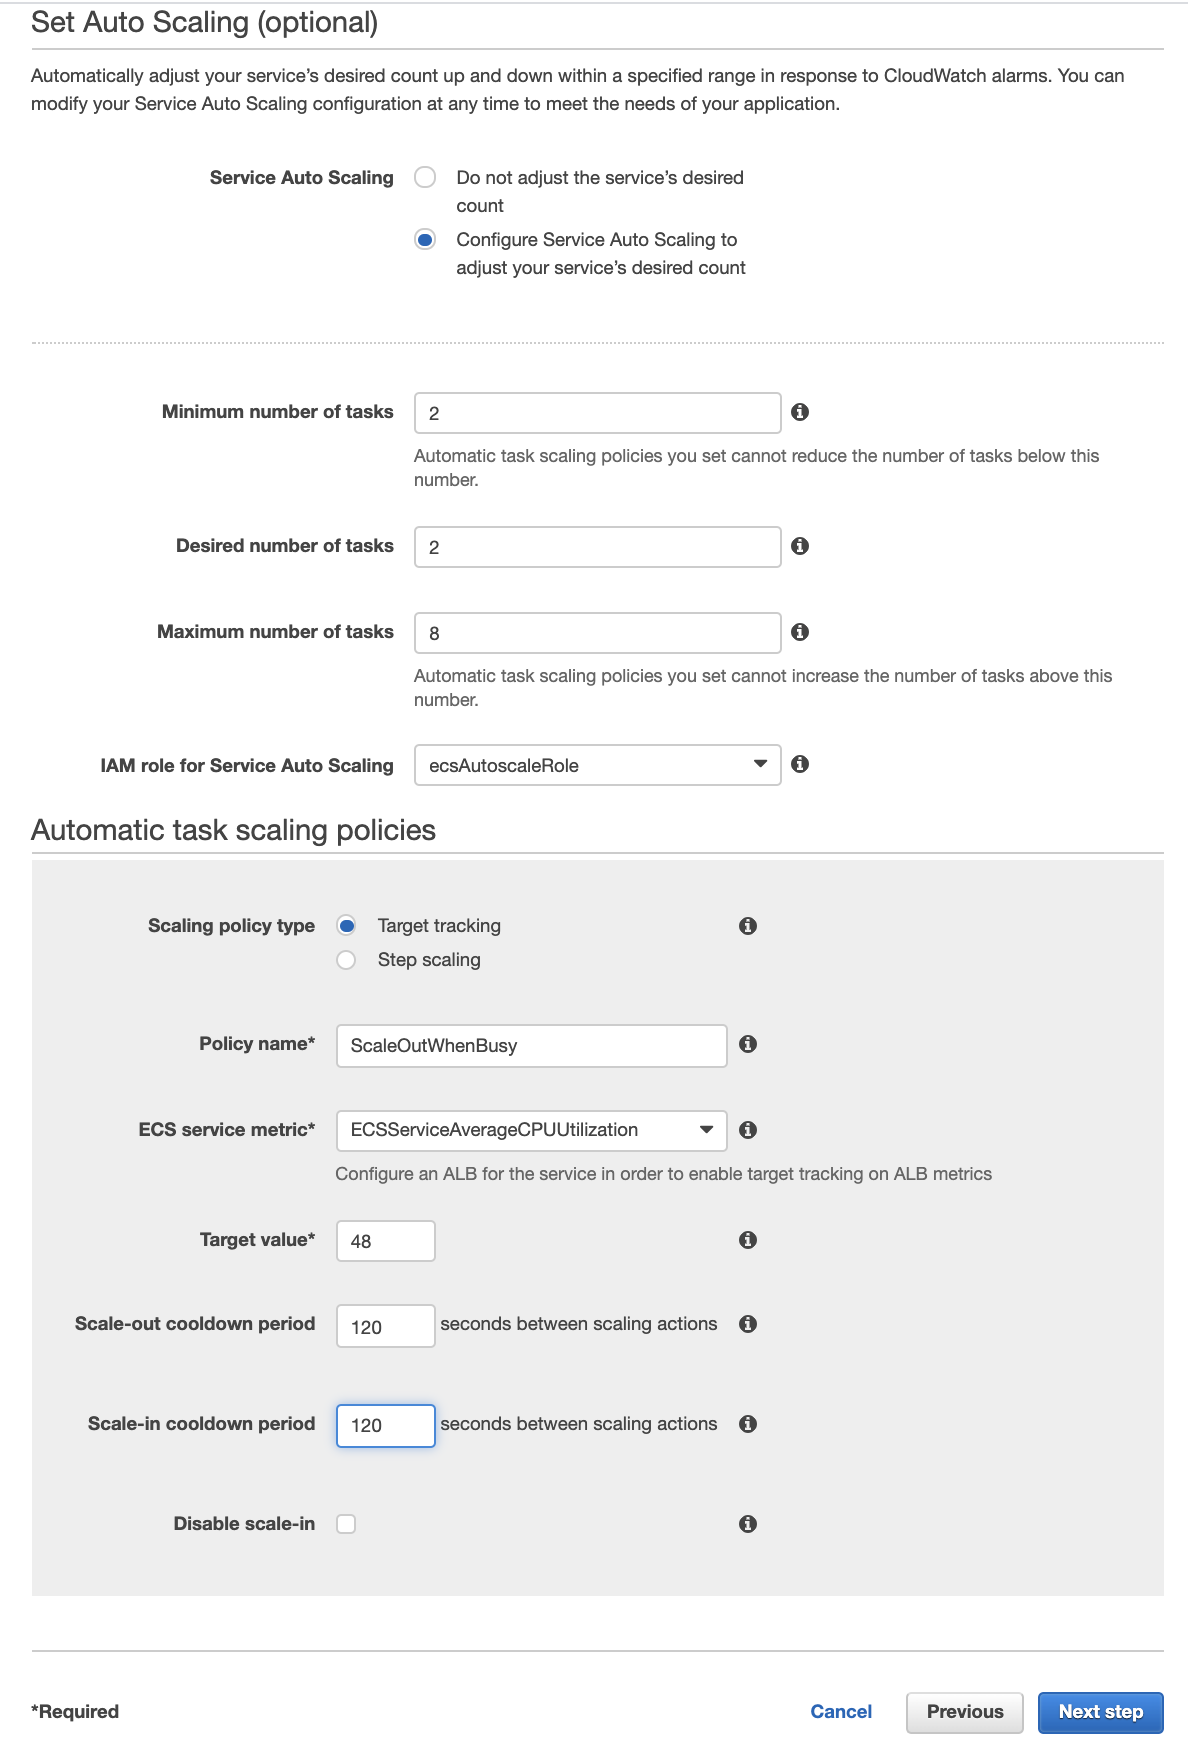
Moving on to the next step, we will configure the autoscaling for this service. We'd like to run a minimum of two services, one in each availability zones for our highly-available app. If our app gets busy we might like for it to scale out so our users don't experience slow service. To provide this functionality but limit our costs we'll allow our app to scale to 8 instances of our backend service.
Next we'll define a scaling policy, which is a cloud watch alarm that triggers a scaling action. For our case we will scale up when our CPUs get too busy. Name your policy something like ScaleOutWhenBusy and select the ECS Service Metric "ECSServiceAverageCPUUtilization." Our target value is 48%. When the combination of our compute resources is 48% or more busy we should launch more instances. We'll set the warmup and cooldown periods to 2 minutes (120s). We want scale-in enabled so that we can shut down resources we no longer need automatically.
Review your configuration and select "Create Service." This task will take longer while the Hosted Zone and Private Namespace are created.
I've found that sometimes your VPC does not get attached to the hosted zone which will keep the service discovery from working. To verify that the scripts got this completed navigate to Route 53 -> Hosted Zones. You should have a hosted zone named .local with 4 record sets. Under hosted zone details ensure that your VPC is included under "associated vpc"
If everything is working properly the command:
curl http://<elb-dns-name>:8080/greeting
Will return {"id":<Some UUID>,"content":"Hello World"}
Experiments Failed Service
We simulate a failed service by making a request to the /crash endpoint of our API, which causes our program to exit.
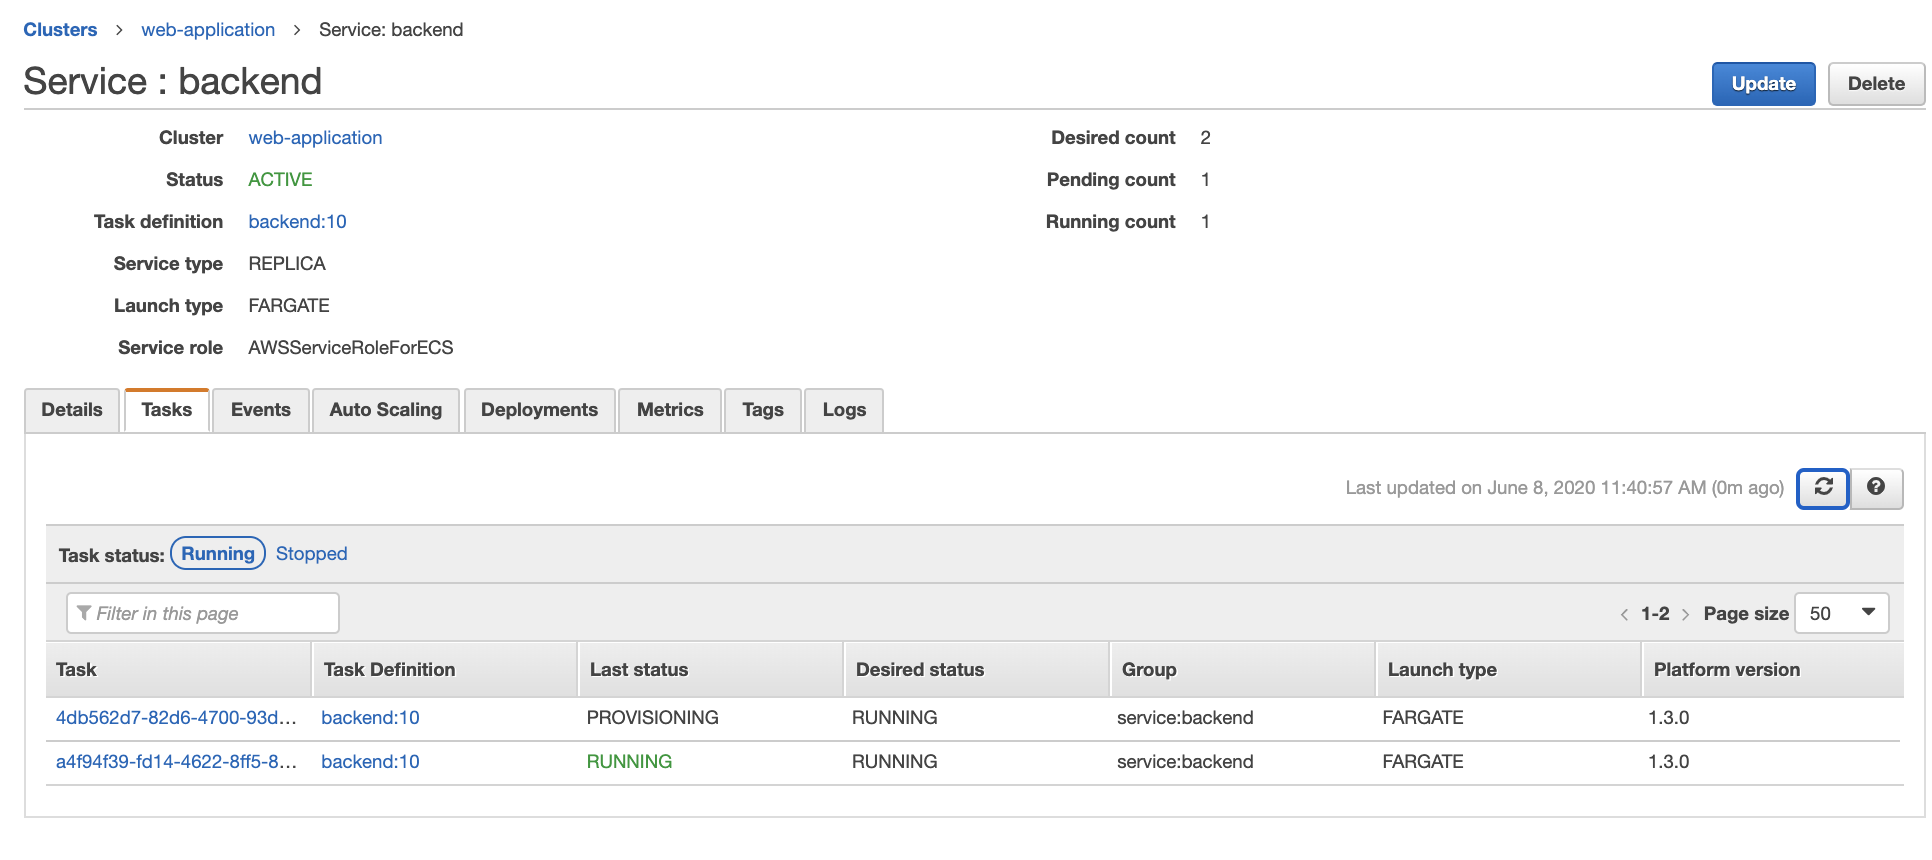
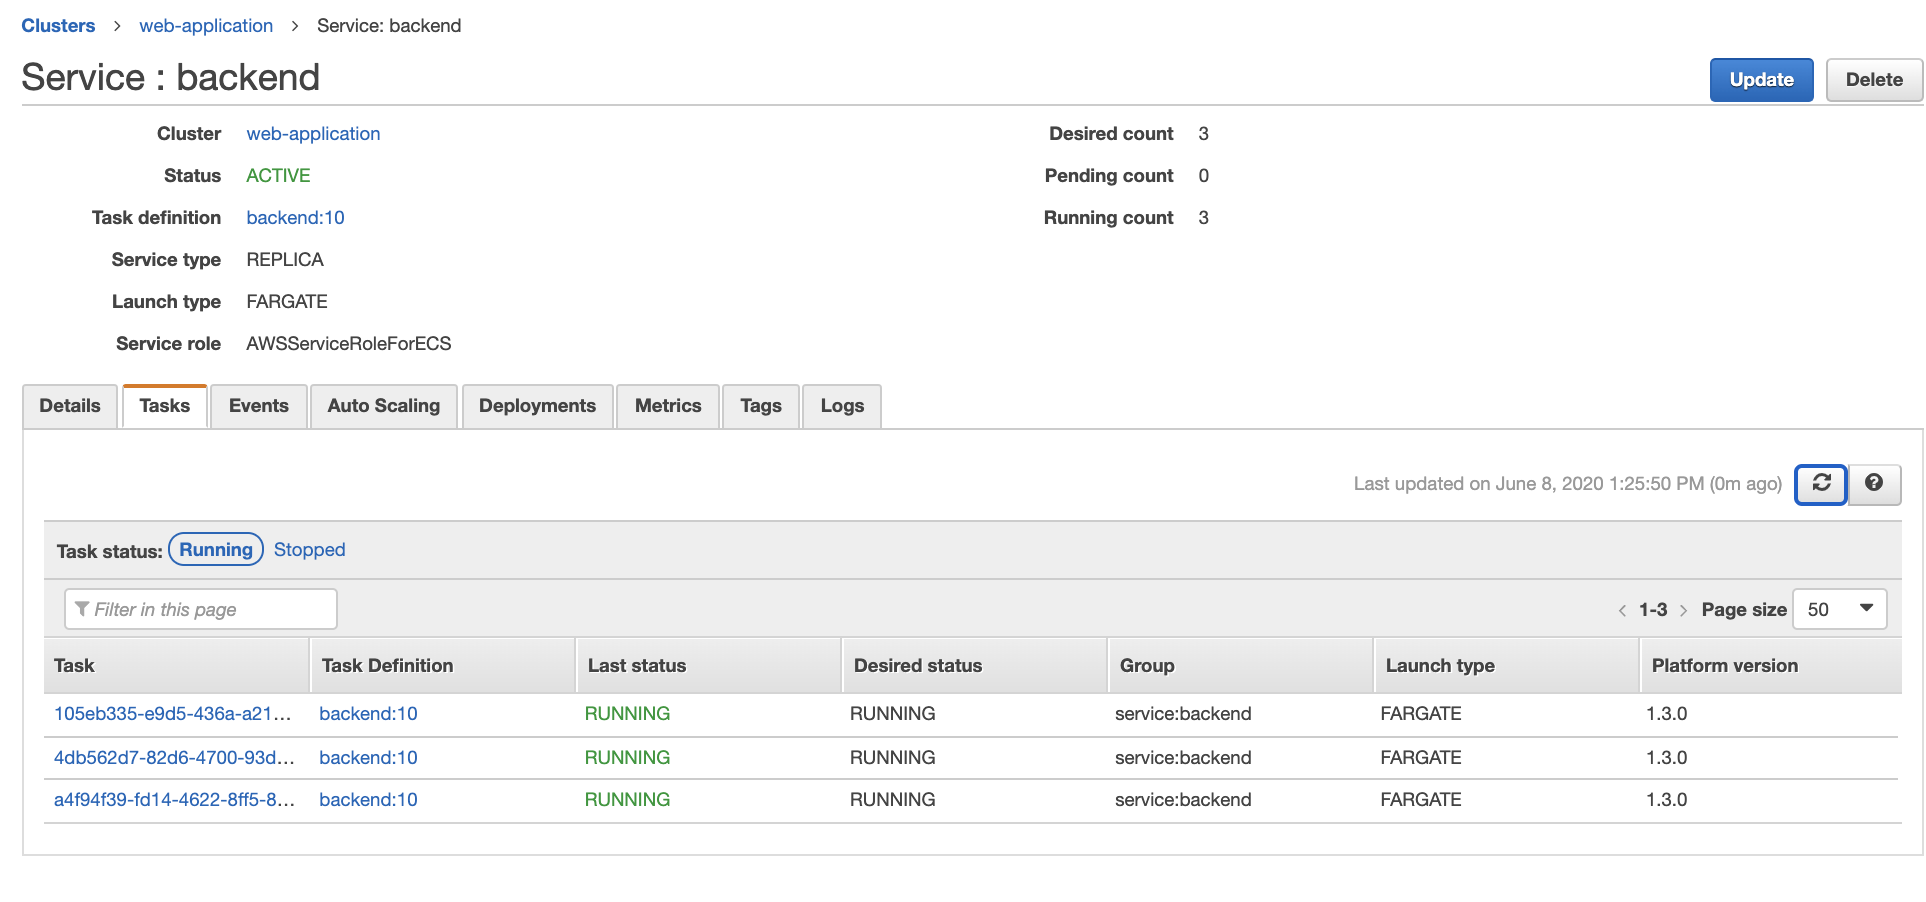
First verify that your backend service has running tasks by accessing it through the web-application cluster -> backend service -> Tasks tab. It should look like this:
Trigger the service failure on the command line with:
curl http://<elb-dns-name>:8080/crash
If the call is successful you will see the return message "crash signal received"
Refresh the service task page. You will see something like this:
This is because the container failed the health check and is automatically being re-provisioned by ECS. In the mean time make a request to the /greeting endpoint. You should not experience a reduction of service, however you will notice that the requests are all being handled by the same instance until the new instance has returned to service.
Autoscaling
Next we'll simulate a heavy workload by putting our backend containers into an infinite loop. Our starting point should be two running services.
Trigger the infinite loop with:
curl http://<elb-dns-name>:8080/infinite
If the call is successful you will see the return message "infinite signal received" and one of your services will have started a new thread doing busywork.
Autoscaling is based upon cloud watch alarms, which have 1 minute resolution, but a 5 minute delay. Come back in 5 minutes to see what's happening. We expect another instance to launch, and indeed it is running!
 Conclusions
We've seen that its pretty easy to get up and running with ECS. Your failed containers are restarted nearly instantly, and your app can scale with an increase resource utilization. The GUI provides a convenient interface for learning the ins and outs of ECS.
Keep in mind that declarative configuration of your ECS stack is a better way to go. You'll be able to keep track of your changes, and re-create working implementations.
One last pro-tip. Pay extra close attentions to security groups and network access control lists when you begin implementing you own solution. If the network traffic is blocked services stop working, and you might spend some time pulling your hair out like I did!


